Perfect Poached Eggs + Labneh Toast

I used to have a roommate who was virtually useless when it came to matters of the kitchen. His go-to meal consisted of reheating frozen corn medley and pairing it with a devastatingly overcooked chicken breast that had been liberally seasoned with enough Mrs. Dash to almost distract you from the fact that no hand-washing had occurred between the handling of the chicken and the remaining food prep. It was truly an abomination to behold.
Despite his lack of interest or concern when it came to providing himself with edible food, the guy could poach an egg perfectly. PERFECTLY. I tried to flesh out his secret for months, eventually recognizing that blissful ignorance was a technique that must be naturally acquired, not taught.
It truly seems that you must adopt one of two VERY different techniques when it comes to poaching eggs perfectly. You must either not care and be so lackadaisical about the process that the egg somehow - perhaps by osmosis - adopts the same attitude and lazily morphs itself into the perfect sphere of gooey yolk and firm white that you are looking for (and as far as I can tell, this technique has worked for few people outside of the aforementioned roommate), OR, you must become dutifully thorough and nitpicky, so that the egg also senses your rigourous standards and pulls itself together (quite literally) because you’ve left it no other choice. You can probably guess which of the two routes my highly-strung, neurotic little self opted to meander down. Here, take my hand, you can come too.
I’m sure you’ve heard plenty of sage advice when it comes to perfectly poaching eggs. Vinegar in the water, the freshest of fresh eggs, and so on. The truth of it is, you need none of that. The first trick to a gorgeous poached egg is simply to strain the egg – letting all of the watery part of the white drain away – to allow for a tighter white that doesn’t develop the ghostly, tattered shroud that many home-poached eggs drape themselves in. The second trick is to get a gentle whirlpool going in the simmering water just prior to lowering the egg in. The swirling of the water helps the egg white wrap around itself instead of wandering about aimlessly through the water for the express purpose of grossing you out.
So here’s what you’re going to do to train yourself on how to make perfect poached eggs. Get a dozen eggs, get your pot of water and all of your accouterments in order, then just start poaching one after the next. Maybe have yourself a little glass or two of wine to give you the false sense of overconfidence that I think might also be a requirement for successful egg-poaching. Trust me, once you’ve done an entire dozen, you will have a distinct feel for how to do it right. Plus those poached eggs keep BEAUTIFULLY overnight and can be doled out the following morning (after a quick dip back in some hot water) without the stressful brow-mopping that normally accompanies Sunday morning egg-poaching antics. Plus it’s super badass to just nonchalantly serve up poached eggs for a crowd like “NBD, I DO THIS ALL THE TIME”. Also, in case you were wondering how to serve all of those badass poached eggs, I’ve left an easy little recipe for you at the end of the egg directions.
Are you ready? Let’s do this.

Perfect Poached Eggs
Taken from Bon Appetit, though not technically their exact ‘BA’s Best’ recipe
Serves as many as you want, duh
Ingredients:
EGGS
Directions:
Fill a medium to large-sized pot with water. You want there to be at least 3 inches of water in your pot. Bring the water to a gentle simmer over medium heat. A gentle simmer means exactly that – small bubbles that are gently making their way to the surface of the water. Not quite a boil, but also not cool enough to stick your finger into. If you’re a novice, it can help to bring the water to a full boil then lower the heat and let the bubbles die down a bit. While the water boils, crack your egg(s) one at a time into a fine-mesh sieve/strainer and let the watery part of the white drip out. Transfer the egg to a small bowl or ramekin. Repeat with remaining eggs, placing each newly drained egg in its own vessel (or just wait and drain eggs one at a time while poaching so you’re not using so many small bowls).
Once you have achieved a soft simmer, swirl a spoon through the water to create a gentle vortex/whirlpool in the middle of the pot. Ever so carefully, tip an egg into the centre of the whirlpool so that the edge of the ramekin/bowl touches the surface of the water – do not just let the egg *plop* in! The egg should ease itself into the water slowly and gracefully. Continue tracing lazy circles around the egg with a spoon, swirling around the egg to help it attain as rounded and tidy a shape as possible. With your free hand, go ahead and set a timer for 2 ½ minutes.
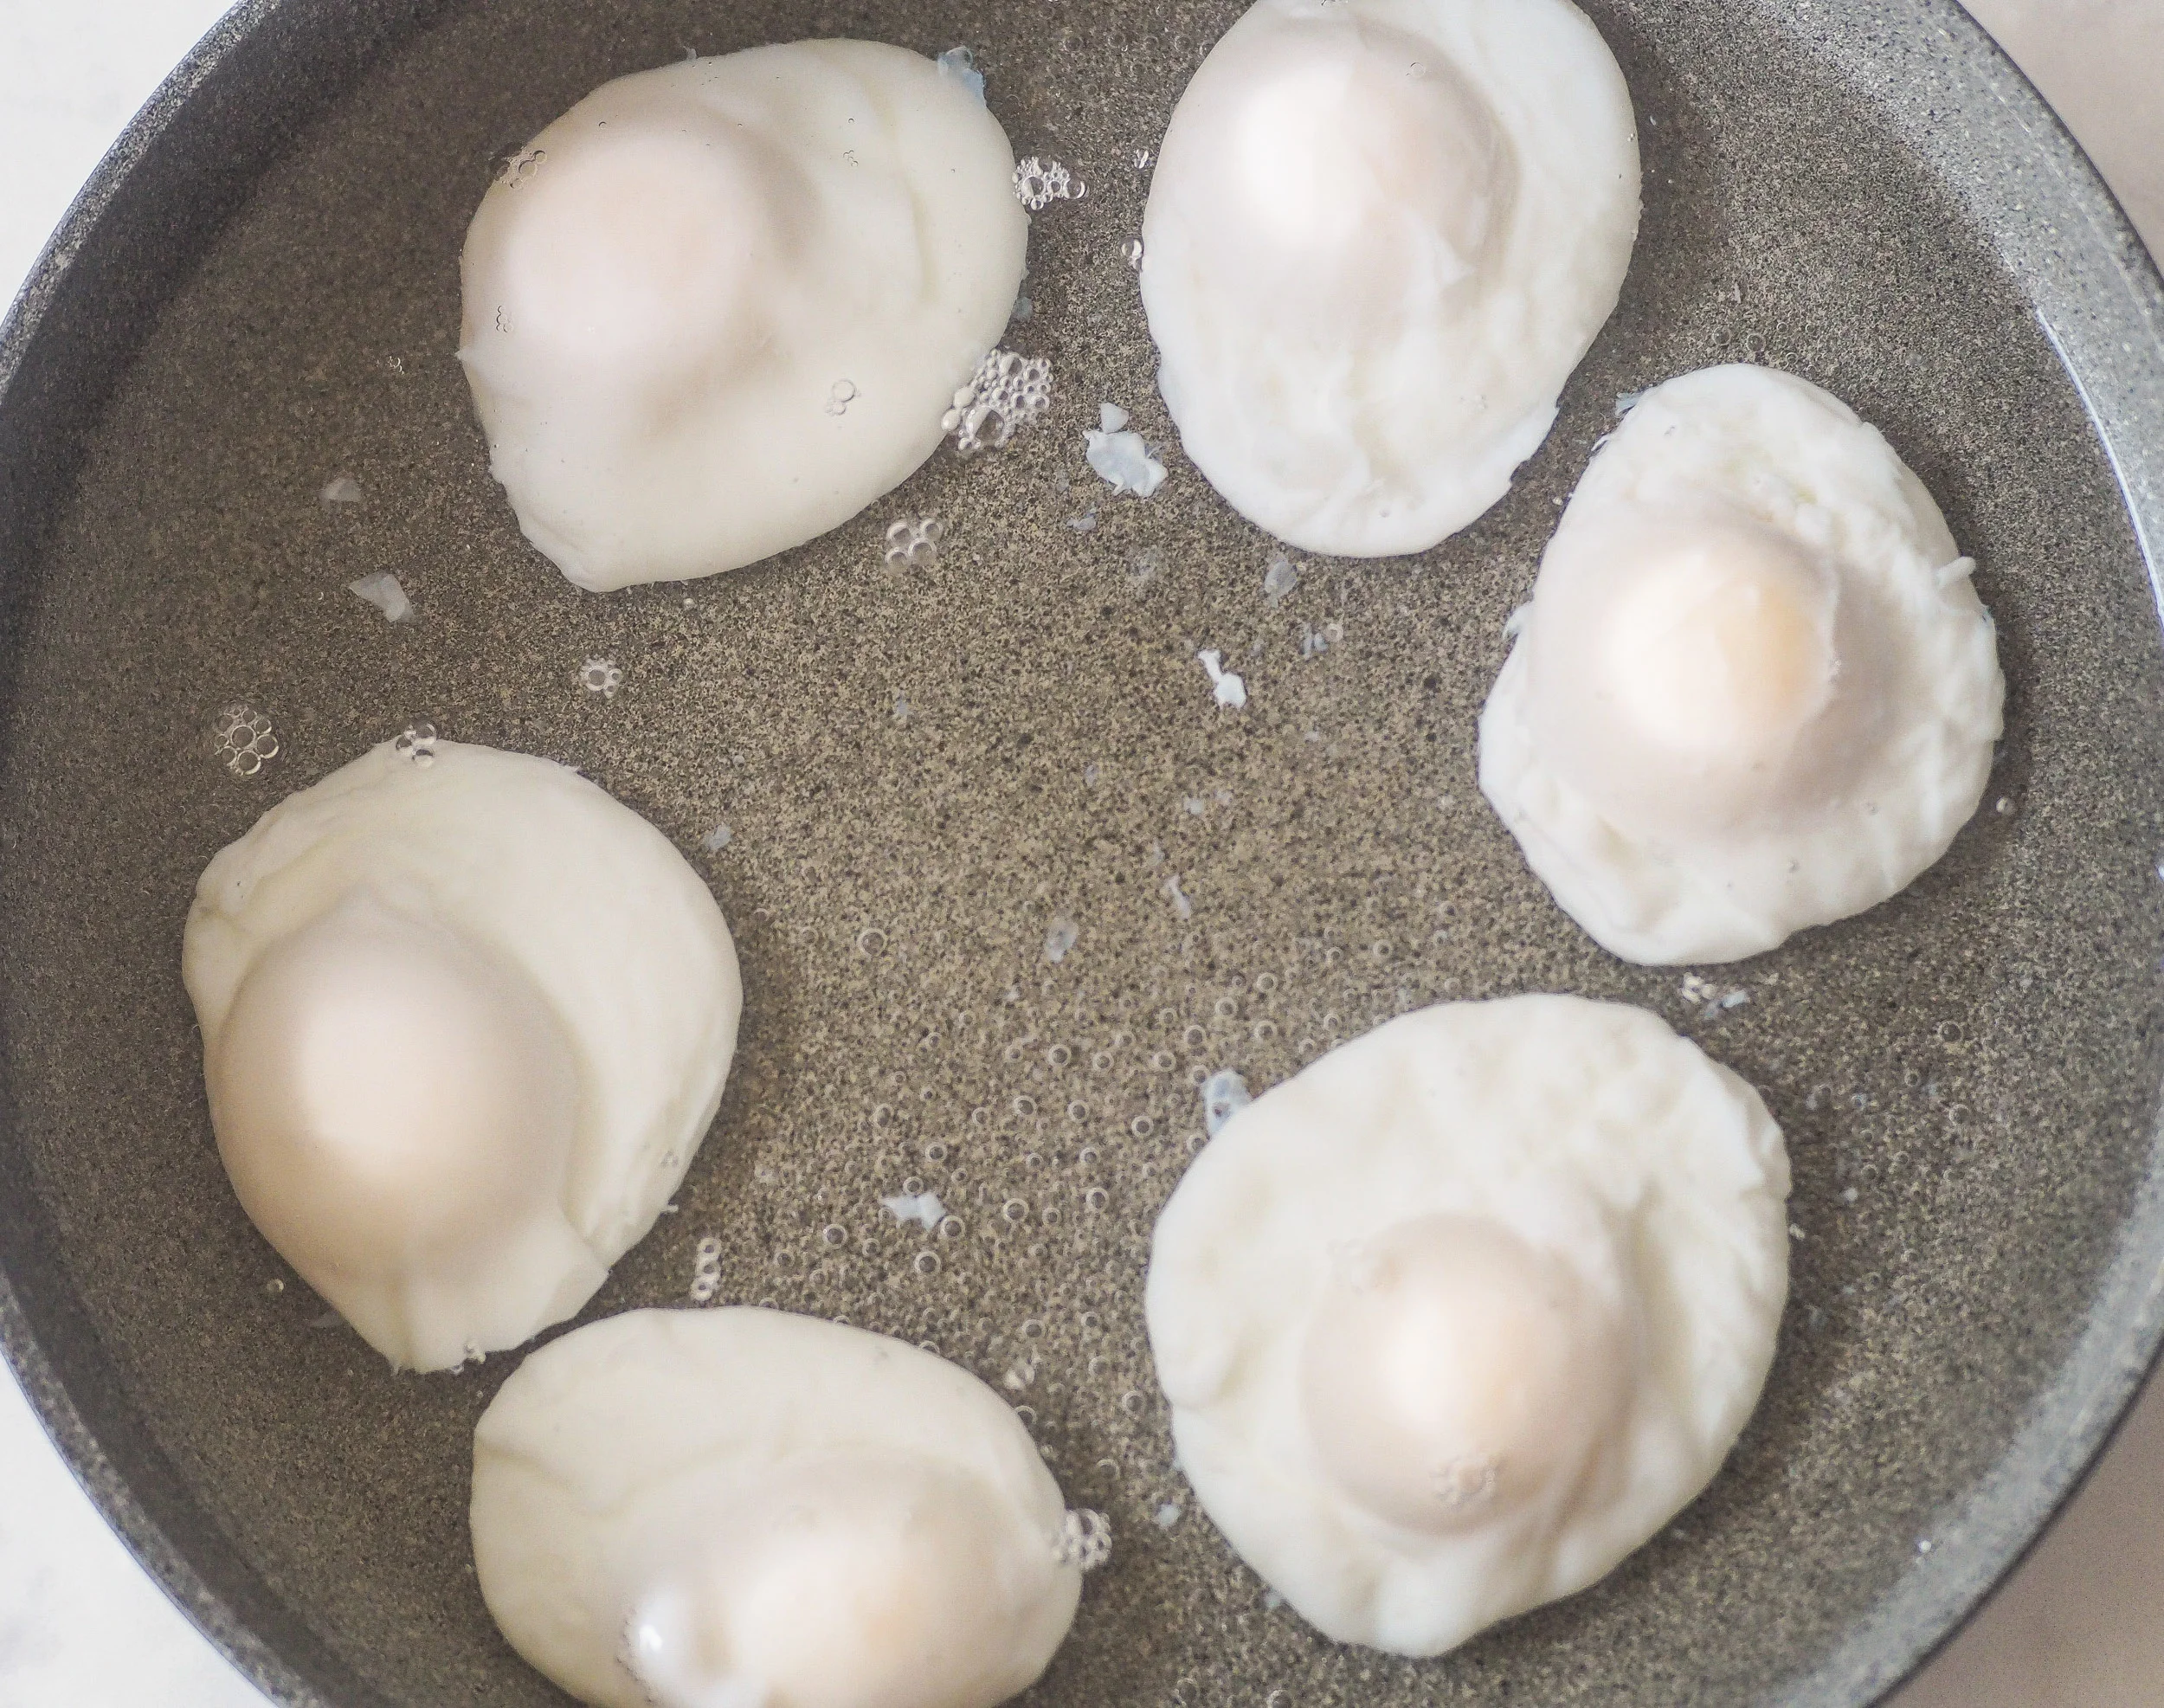
Once the timer rings, lift the egg gently out of the water (using a slotted spoon or ladle) and carefully poke it to ensure that the whites are set but the yolks are soft to the touch. Transfer the cooked egg to a large bowl of warm water (if planning to serve immediately) or to a large bowl of ice water (if planning to keep for later use). Repeat the draining/swirling/cooking/etc steps for remaining eggs. I found it best to learn how to poach an egg by doing one at a time. Once you get more comfortable with the process, you can get a bigger pot and do 2-3 at a time.
Serve once all of your eggs are cooked OR (if using an ice bath), transfer the ice water and eggs to a lidded container and keep in the fridge for up to a day. To re-heat, bring a pot of water to a bare simmer and gently drop the eggs into the hot water for 1 minute before serving. If you’re fussy about presentation, you can use scissors to snip all of the thready strands of white that detract from your perfectly rounded egg.

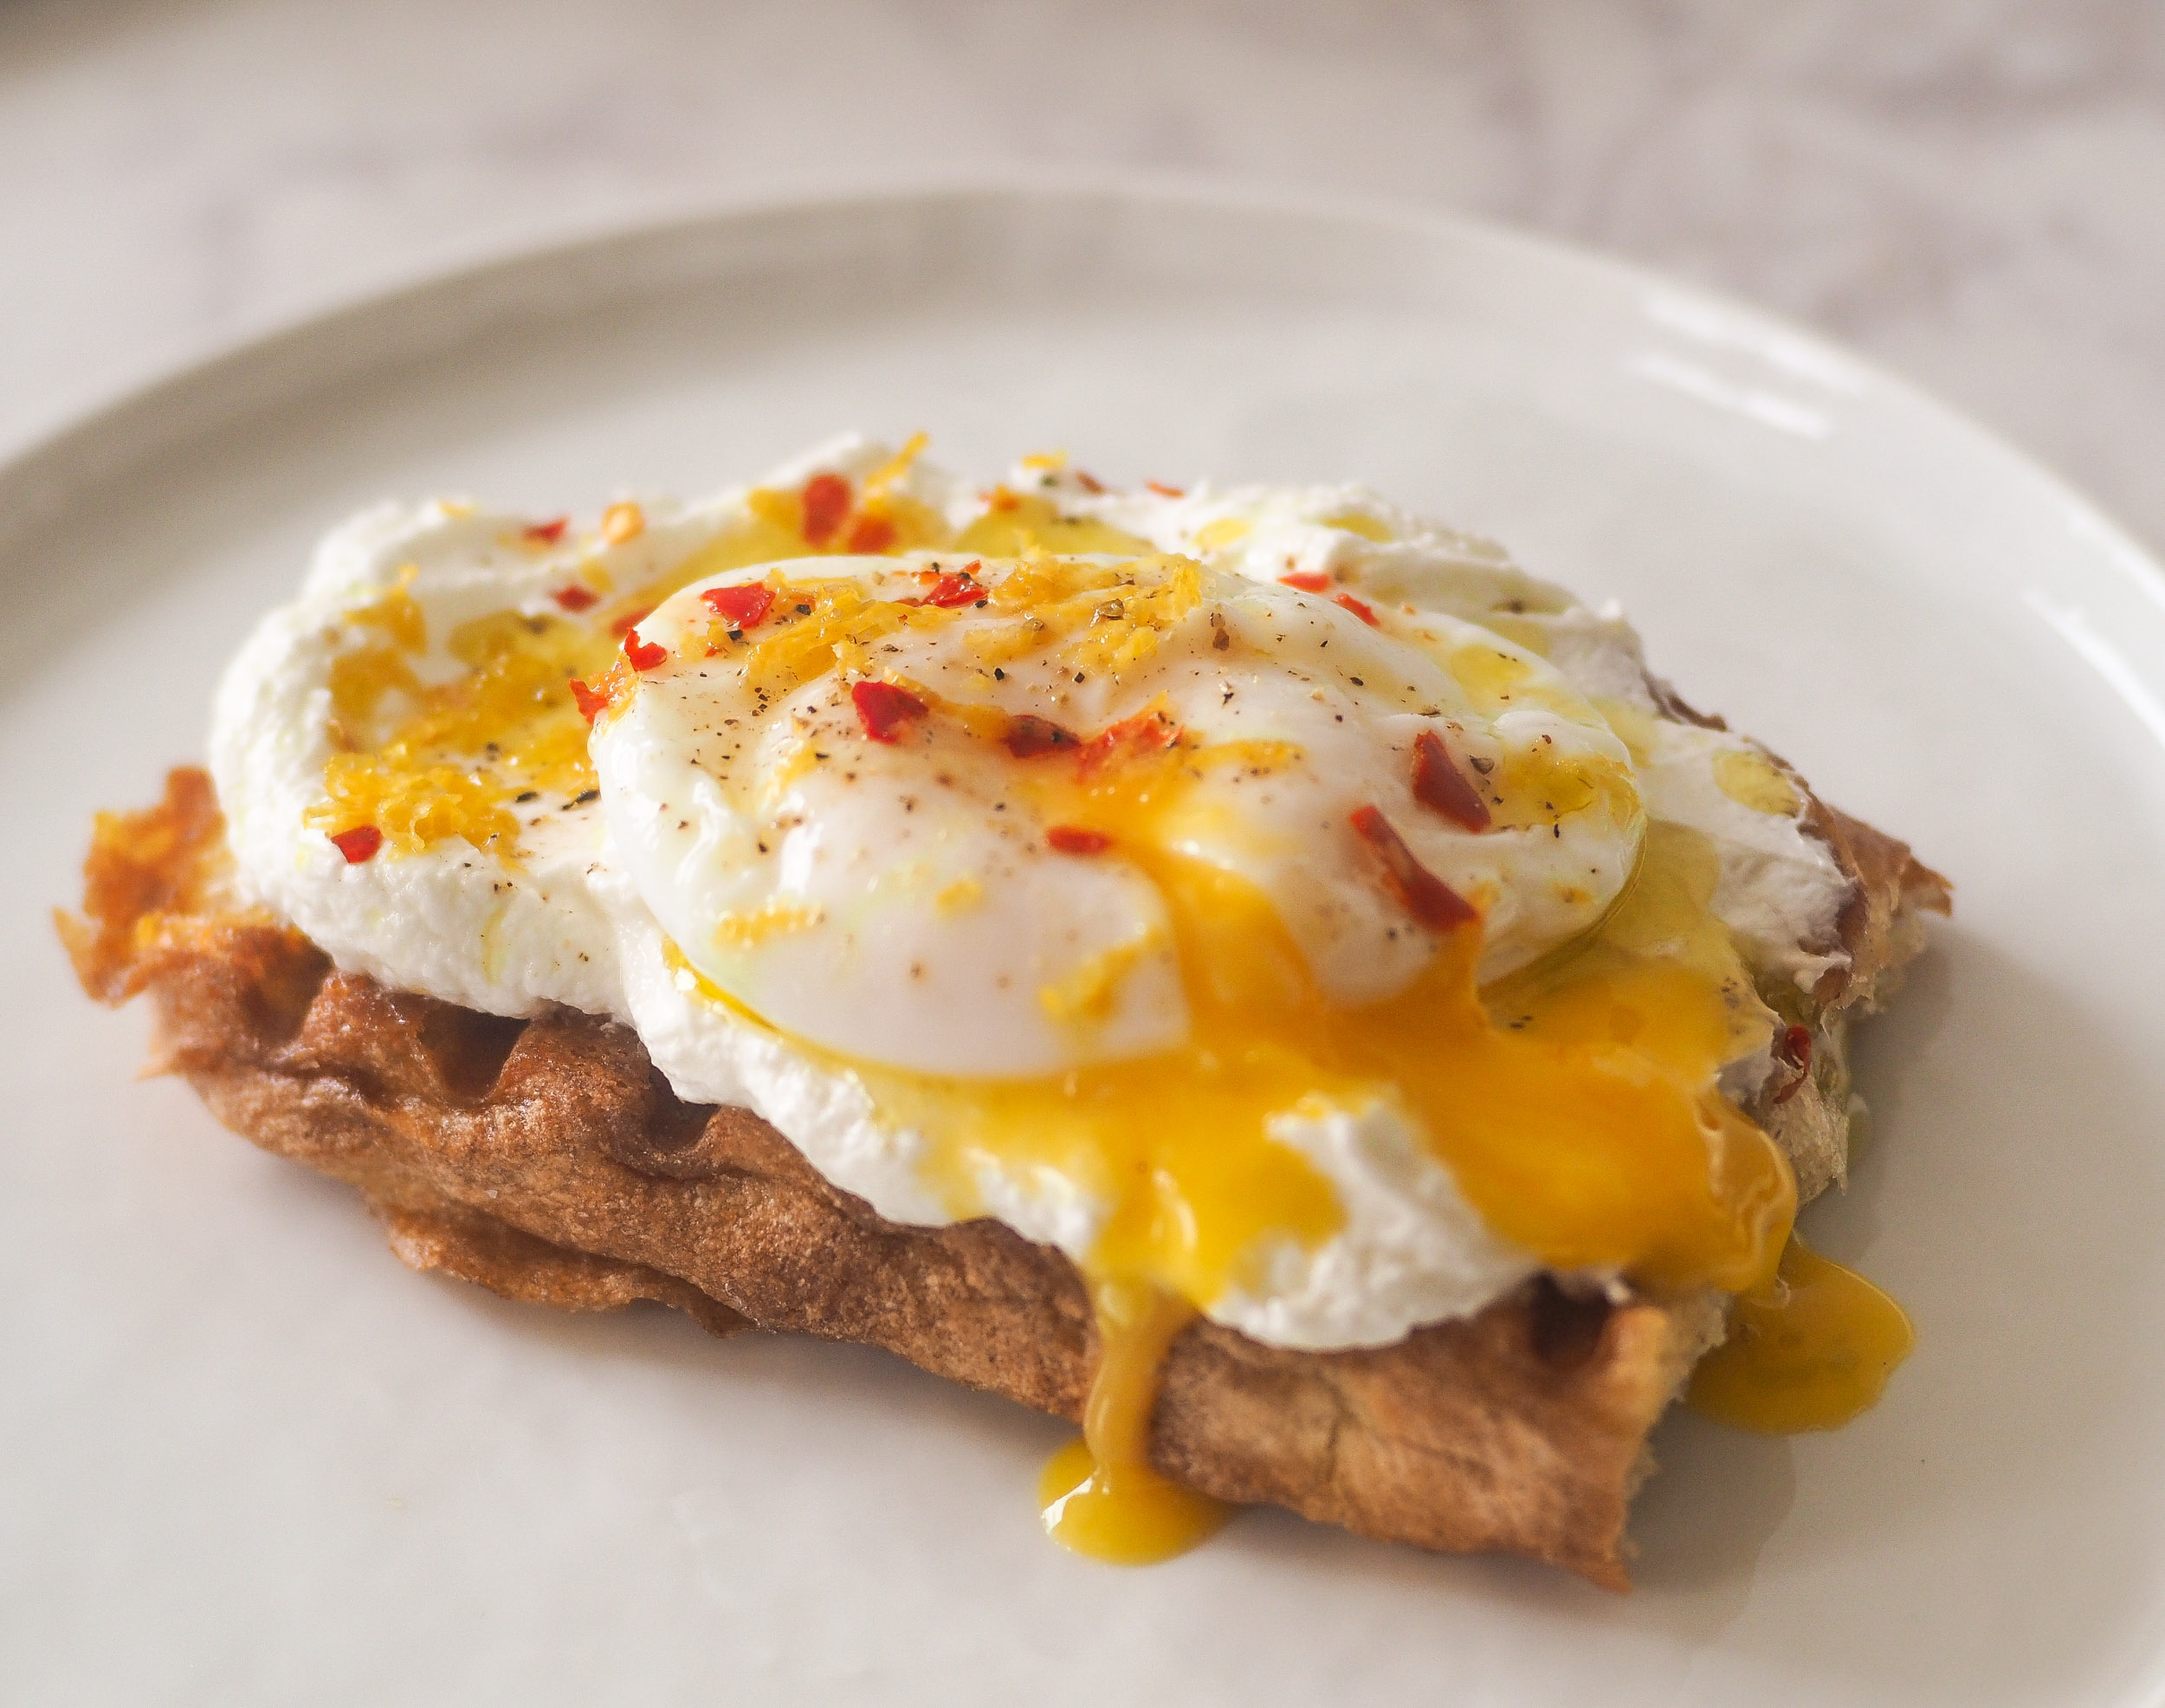
Grilled Bread with Labneh, Poached Eggs, and Chili Flakes
Serves 2
Ingredients:
2 cups labneh (a thick, strained Middle Eastern yogurt) OR 2 cups full-fat plain Greek yogurt (see first paragraph of Directions)
4 thick slices of rustic or country-style bread (at least ½ inch thick)
1 large clove of garlic, cut in half cross-wise
4 tbsp vegetable or olive oil
4 poached eggs
1 tbsp chili flakes
Zest of 1 lemon
Good-quality extra-virgin olive oil, to serve
Flaky salt, such as Maldon
Directions:
If making homemade labneh, transfer the Greek yogurt into a large fine-mesh strainer lined with cheesecloth. Place the strainer over a bowl and leave it overnight in the fridge. In the morning, discard the liquid from the bowl, lightly season the yogurt with a pinch of salt, and set aside. You just made labneh!
To grill the bread, heat a griddle pan or BBQ to high heat. While the grill heats, brush each side of the bread slices with olive oil. Lightly season each slice with salt. Grill the bread for 2-3 minutes per side, or until grill marks appear and the bread is golden and toasted. It helps to press the bread down when it first goes on the heat, either with a grill press or by pressing a plate down on top of each slice. When the bread comes off the heat, immediately rub each piece with the cut side of a garlic clove and place on a cooling rack.
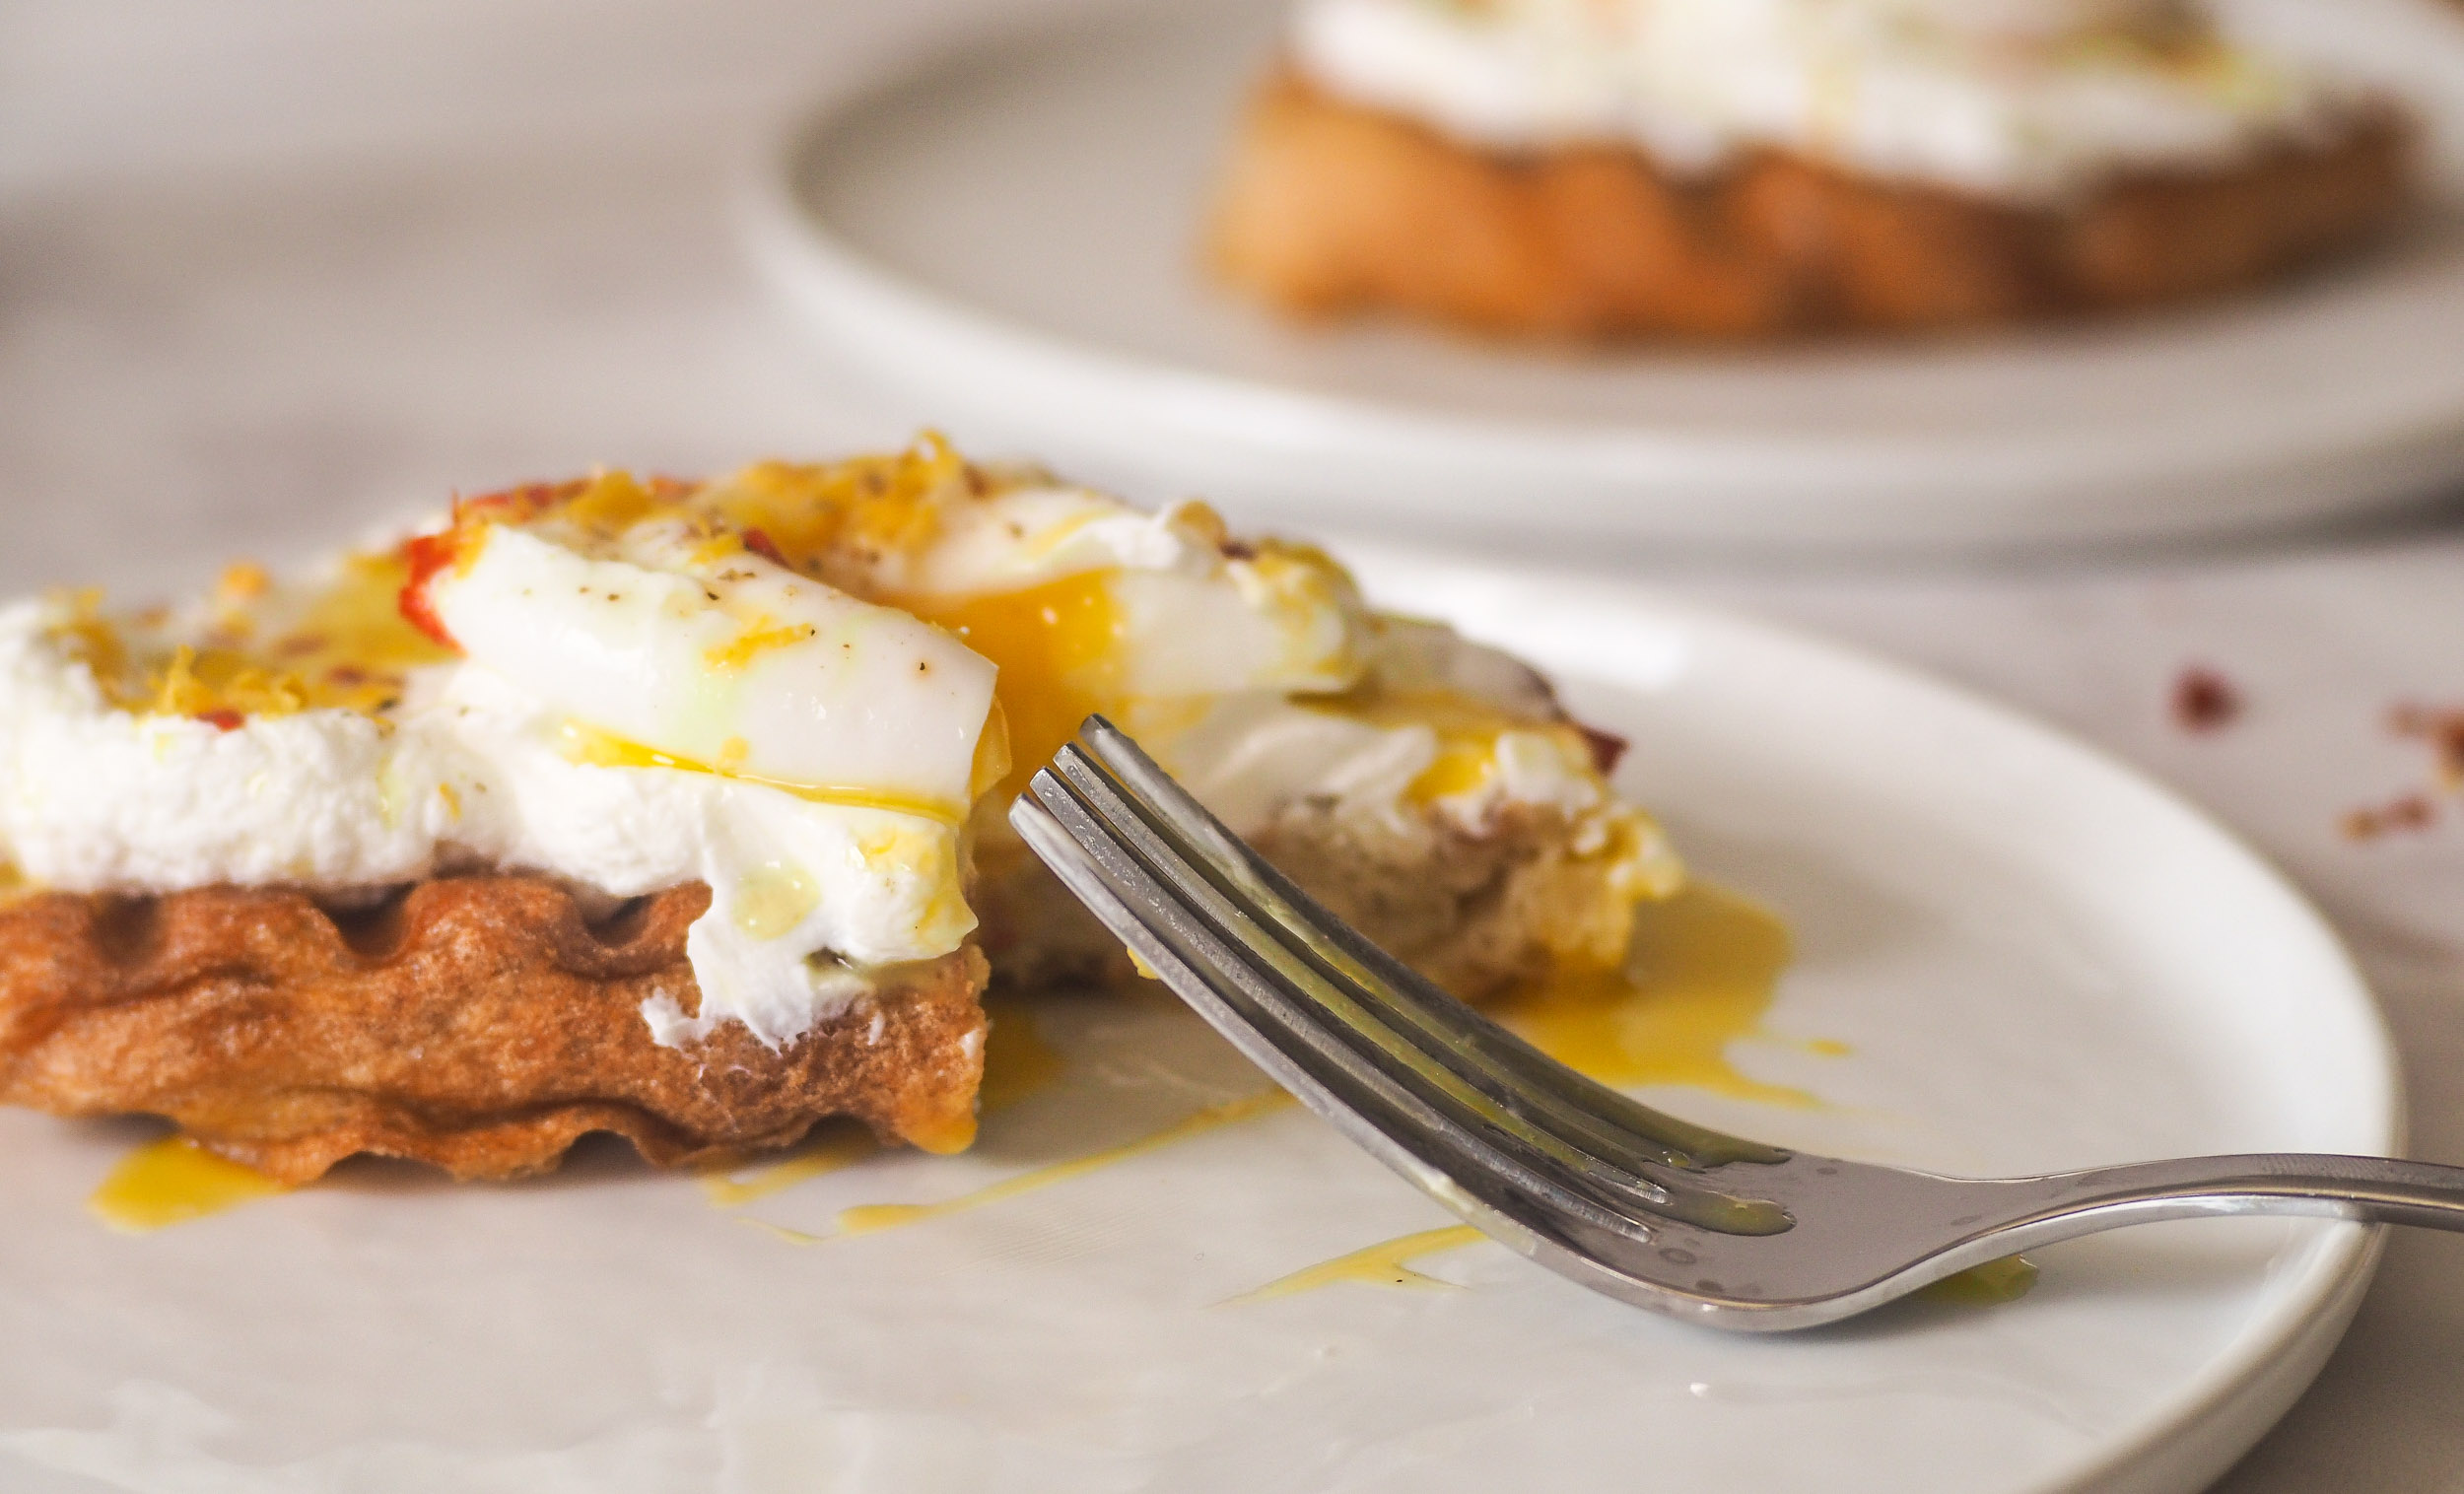
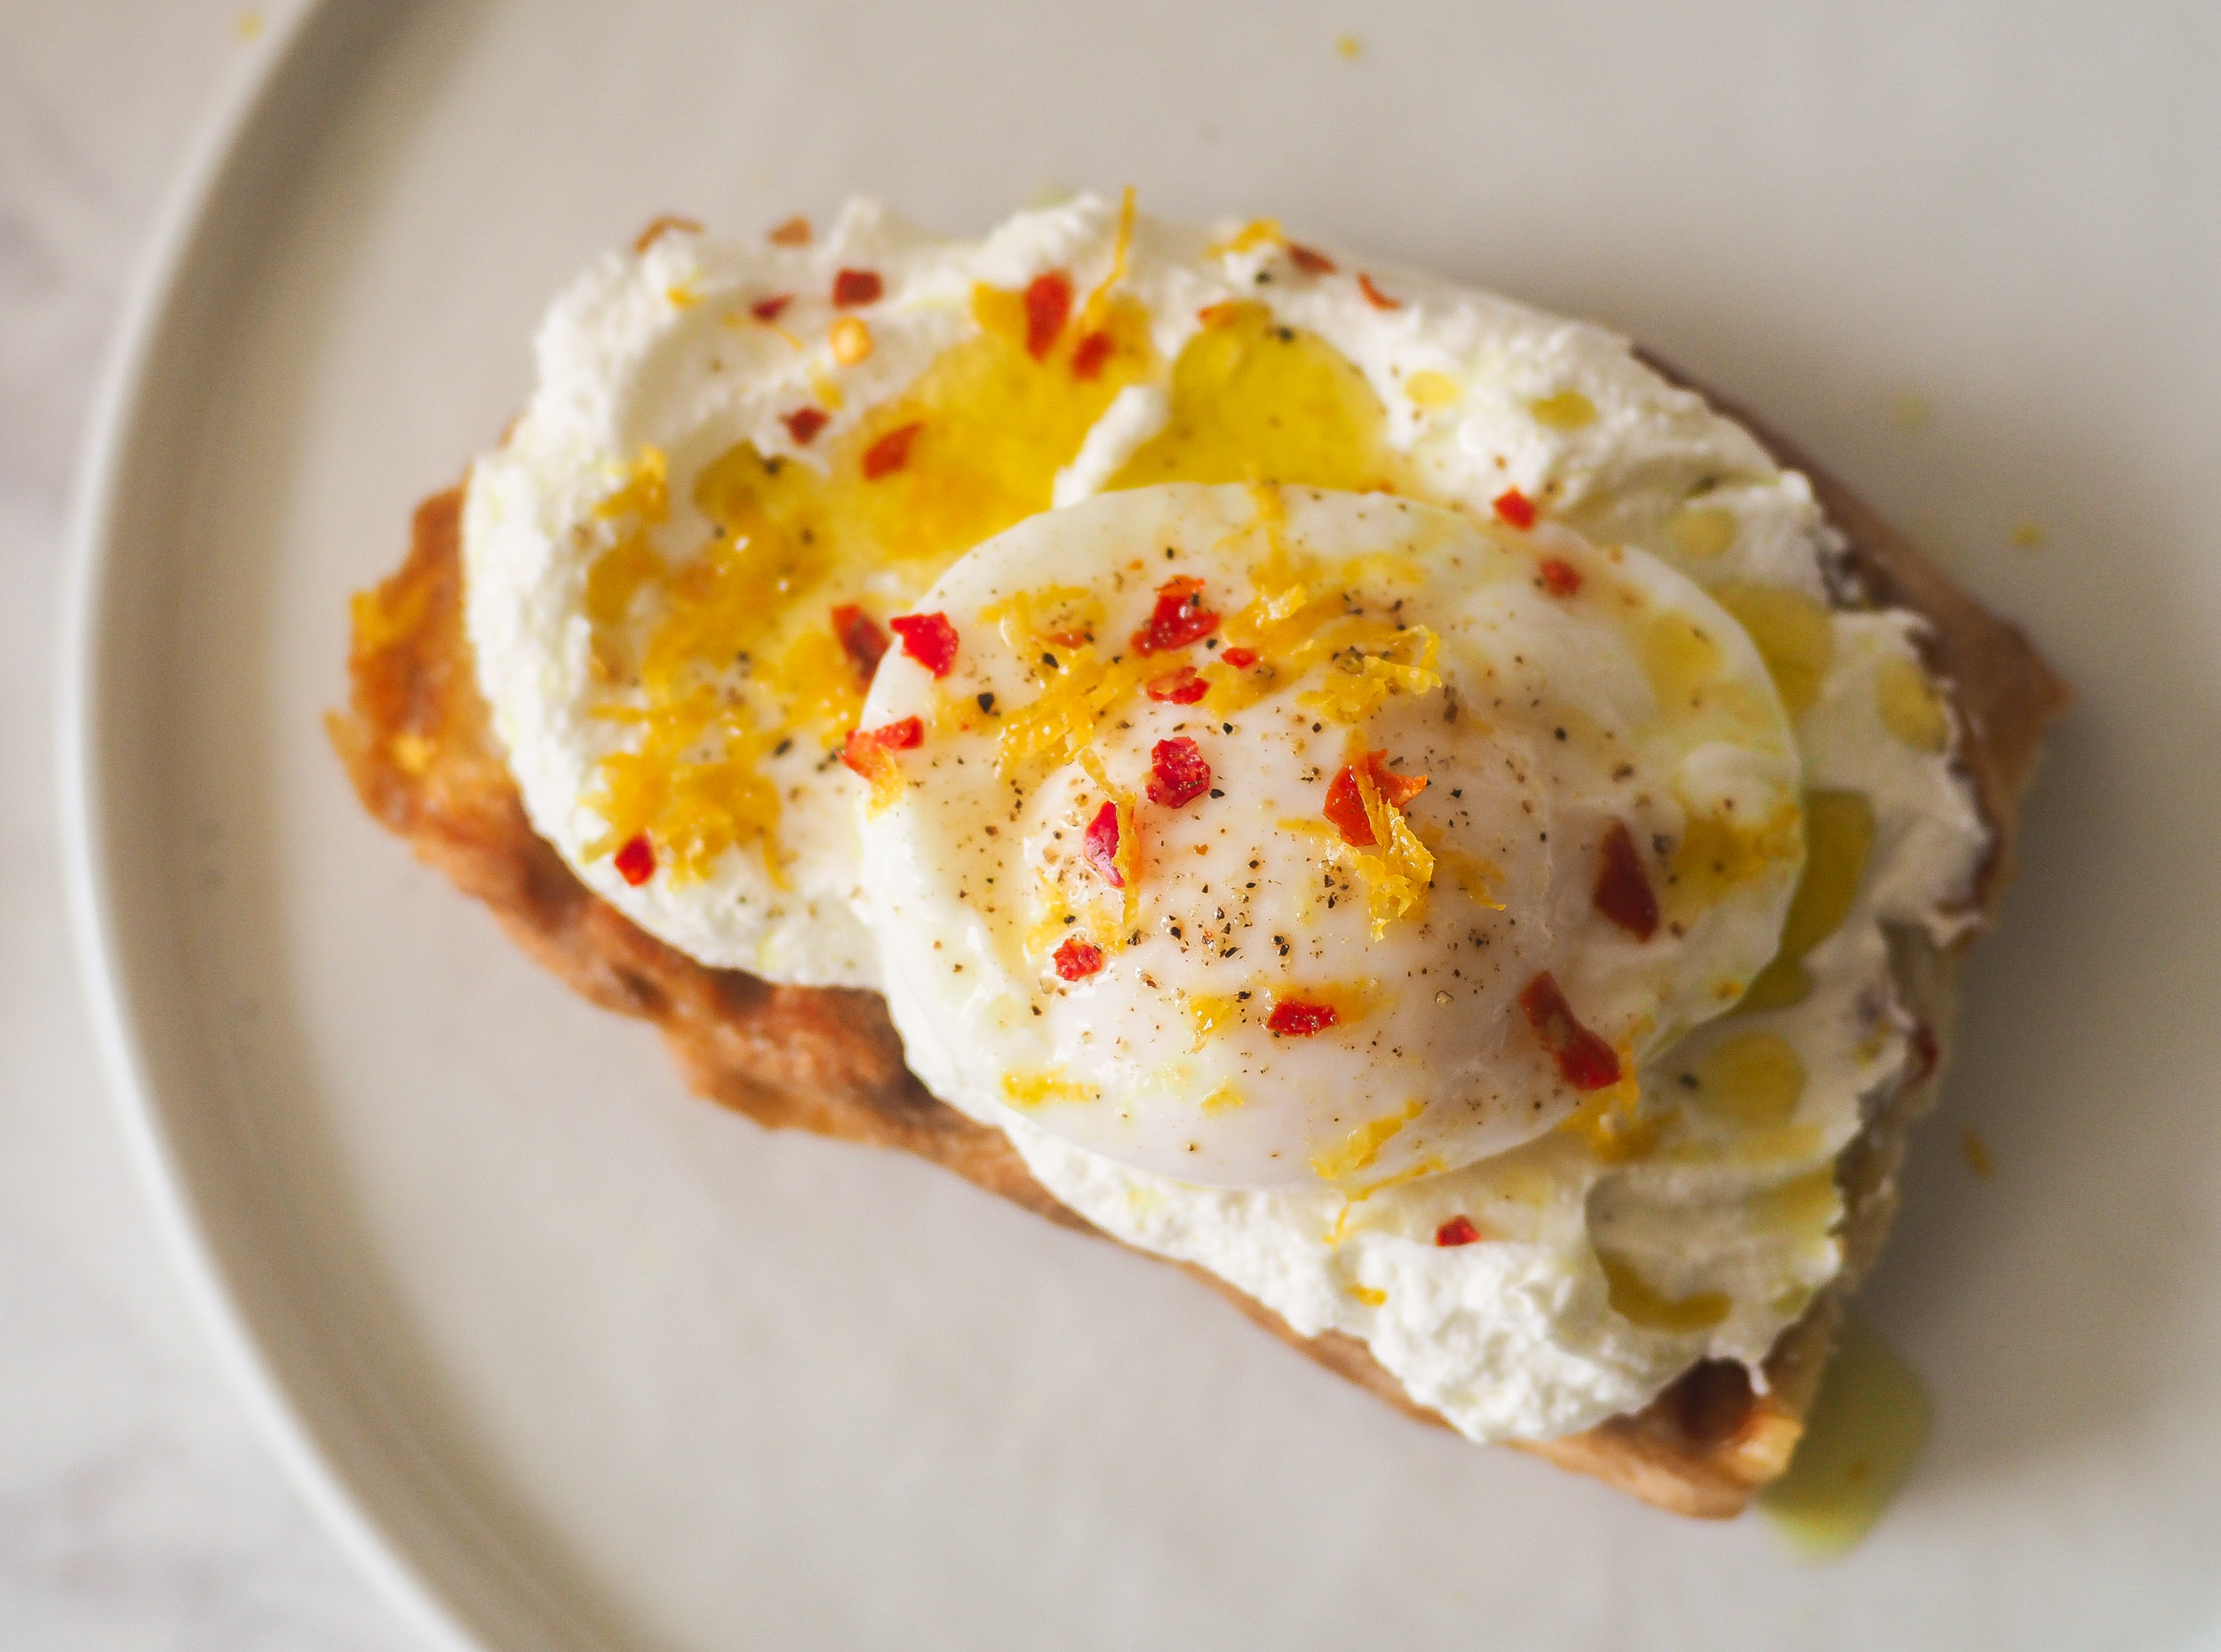
Spread each slice of bread with a thick smear of labneh. Delicately place one poached egg on top of each slice. Drizzle the toasts with good olive oil and sprinkle with lemon zest, chili flakes, and flaky salt. Finish with a grind of black pepper and serve immediately, while the eggs are still oozy.