BA’s Best: Tarte Tatin


Consider this recipe a jumping off point for all sorts of delightful tarte tatin spin-offs. Make the original recipe listed below and then start fooling around with slight tweaks and variations. Forgo the vanilla beans and substitute a bit of apple brandy instead of the vanilla extract. Up the salt quantity and go for more of a salted caramel flavour. Brown the butter (then cool it) before stirring into the caramel. The possibilities are endless as is the amazement that this tart will garner you, regardless of how and if you tweak it.
Now for a brief note on the use of puff pastry. While puff pastry is dead easy to use, it does require one tiny bit of effort and forethought: THAWING (this is especially true if you’ve bought a block instead of a sheet). Please don’t even consider, don’t even contemplate, don’t even pontificate the idea of speeding up your puff pastry thawing in any way. Honestly, if you even look sideways at the defrost setting on your microwave, I will hunt you down. You have been warned. Baking is always so much more fun when it comes with a stern talking-to first, isn’t it?

BA’s Best: Tarte Tatin
Taken directly from BA’s Best arsenal, with the most minor of tweaks here and there
Makes 1 tart (serves 6-8)
**A note about the skillet used in this recipe: I recommend using something that is both oven-proof (a must) and that has a bit of non-stickability (not required, but highly recommended). This does not mean a non-stick pan strictly, a cast-iron could also work if it were well-seasoned and broken in. I opted for this specific skillet, which is my favourite pan for a lot of tasks.
Ingredients:
6 crisp baking apples, roughly 2 lb. (e.g. Pink Lady, Honeycrisp, Braeburn, Northern Spy, Gala…the list goes on and on based on your region)
½ cup white sugar, divided
½ vanilla bean (or 1 tsp vanilla extract if you must)
2 tbsp unsalted butter
1 tbsp apple cider vinegar
Pinch of kosher salt (more if you want a salted caramel)
1 sheet frozen puff pastry (preferably all-butter; usually comes in a 14-oz package, weight is not important though – you just need enough to roll a 10-inch circle from), thawed
All-purpose flour, for dusting
Icing sugar, for dusting
Directions:
Preheat your oven to 400 degrees F (unless your oven runs cold, in which case go up an extra 25 degrees – but I find most ovens run hot). Peel the apples and cut each one into 3 “lobes”, removing as much core as possible. I accomplished this by cutting each apple into one piece that was not quite half the apple, then cutting the remaining apple off the core into two equal pieces. So really, each apple winds up being cut into 1 bigger piece and 2 slightly smaller, equal-sized pieces. You should be left with a fairly tightly trimmed core, which can be discarded. Set the apples aside (don’t worry about the browning that will inevitably happen).
Scatter ¼ cup of the white sugar into a heavy, 9-inch (or so) skillet. I used an 8-inch skillet – as long as you’re close to this diameter, it’s all good. Cook the sugar over medium heat, stirring occasionally until melted and beginning to caramelize (about 6-8 minutes). If you are using a dark pan and can’t tell when the sugar is changing colour, spoon a tiny bit onto a white plate – you’re looking for a pale amber shade. Add the remaining ¼ cup sugar to the pan and cook until the sugar has completely dissolved and taken on a deep amber colour. If you accidentally burn your sugar, clean the pan (good luck!) and start again – this is non-negotiable.
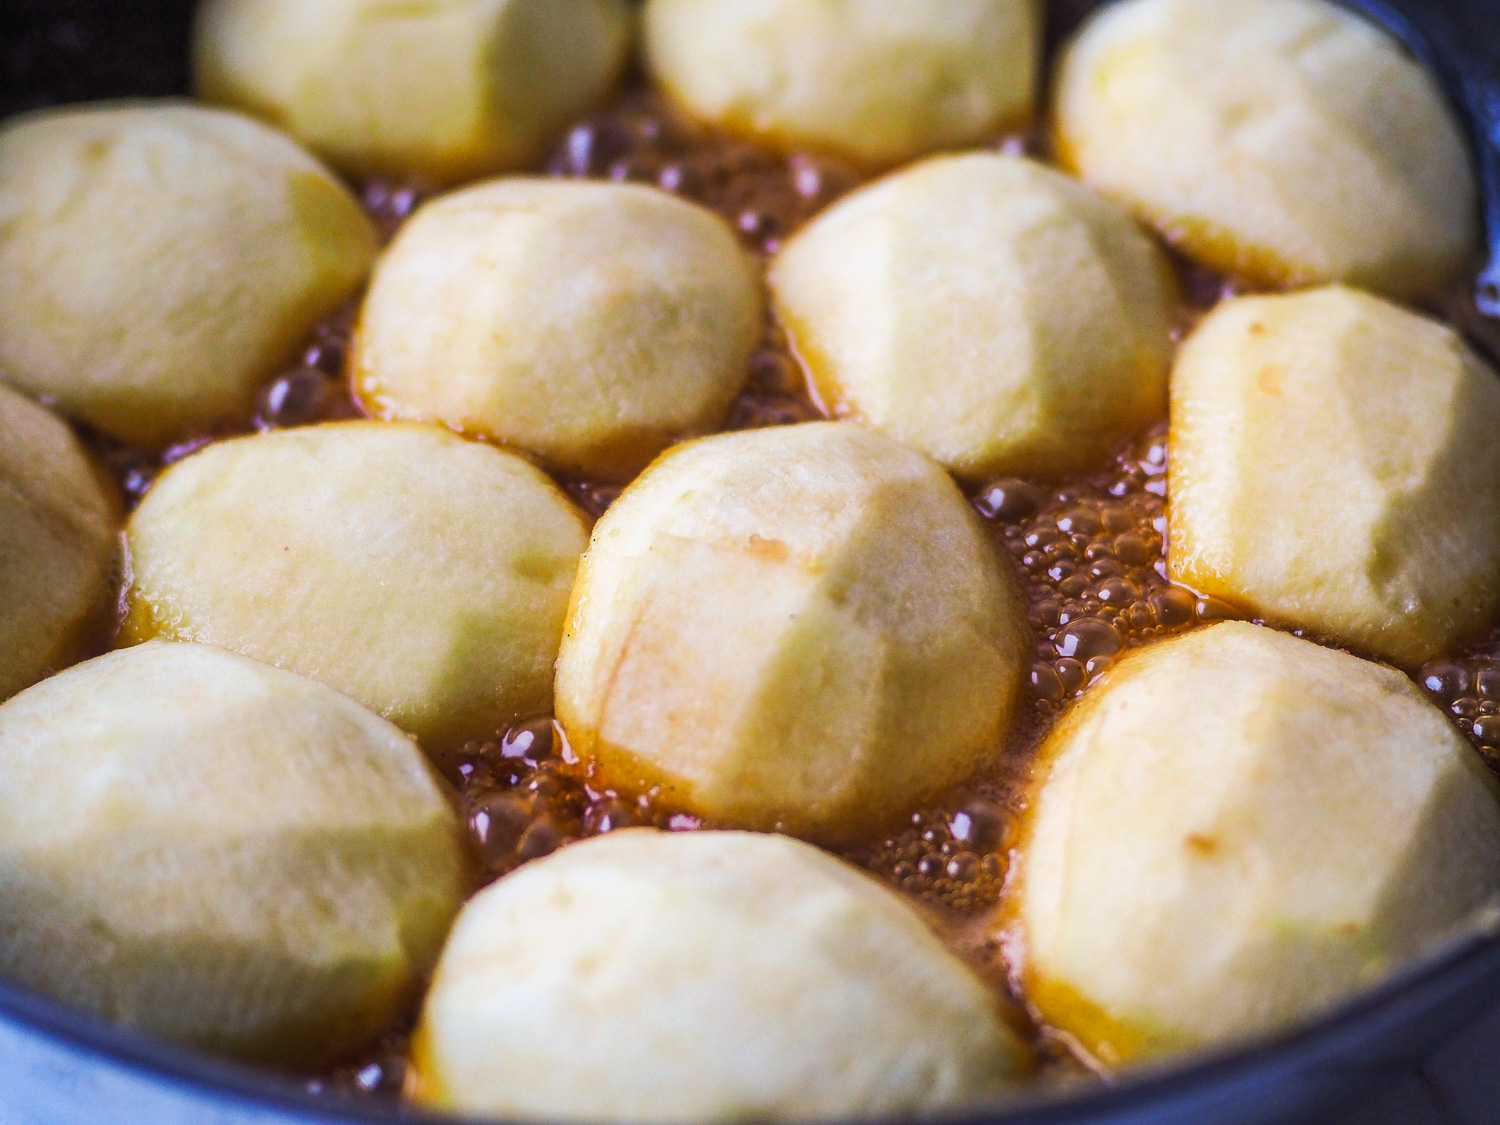
Stir the butter, vinegar, and salt into the caramel. Arrange the apple pieces (cut side down) in a circular pattern in the skillet until you cannot fit anymore, then cook until they start releasing their juices and shrink up a bit, roughly 5-8 minutes. Very carefully turn the apples over (cut side up now) and scooch them together so that they overlap slightly. If you find that you under-estimated how many pieces fit into the pan, go ahead and squish in a couple more pieces (don’t worry about them being raw, everything will get cooked – at this point it’s more important to have the pan be full of apples with as few gaps between them as possible). Remove the skillet from the heat and set aside.
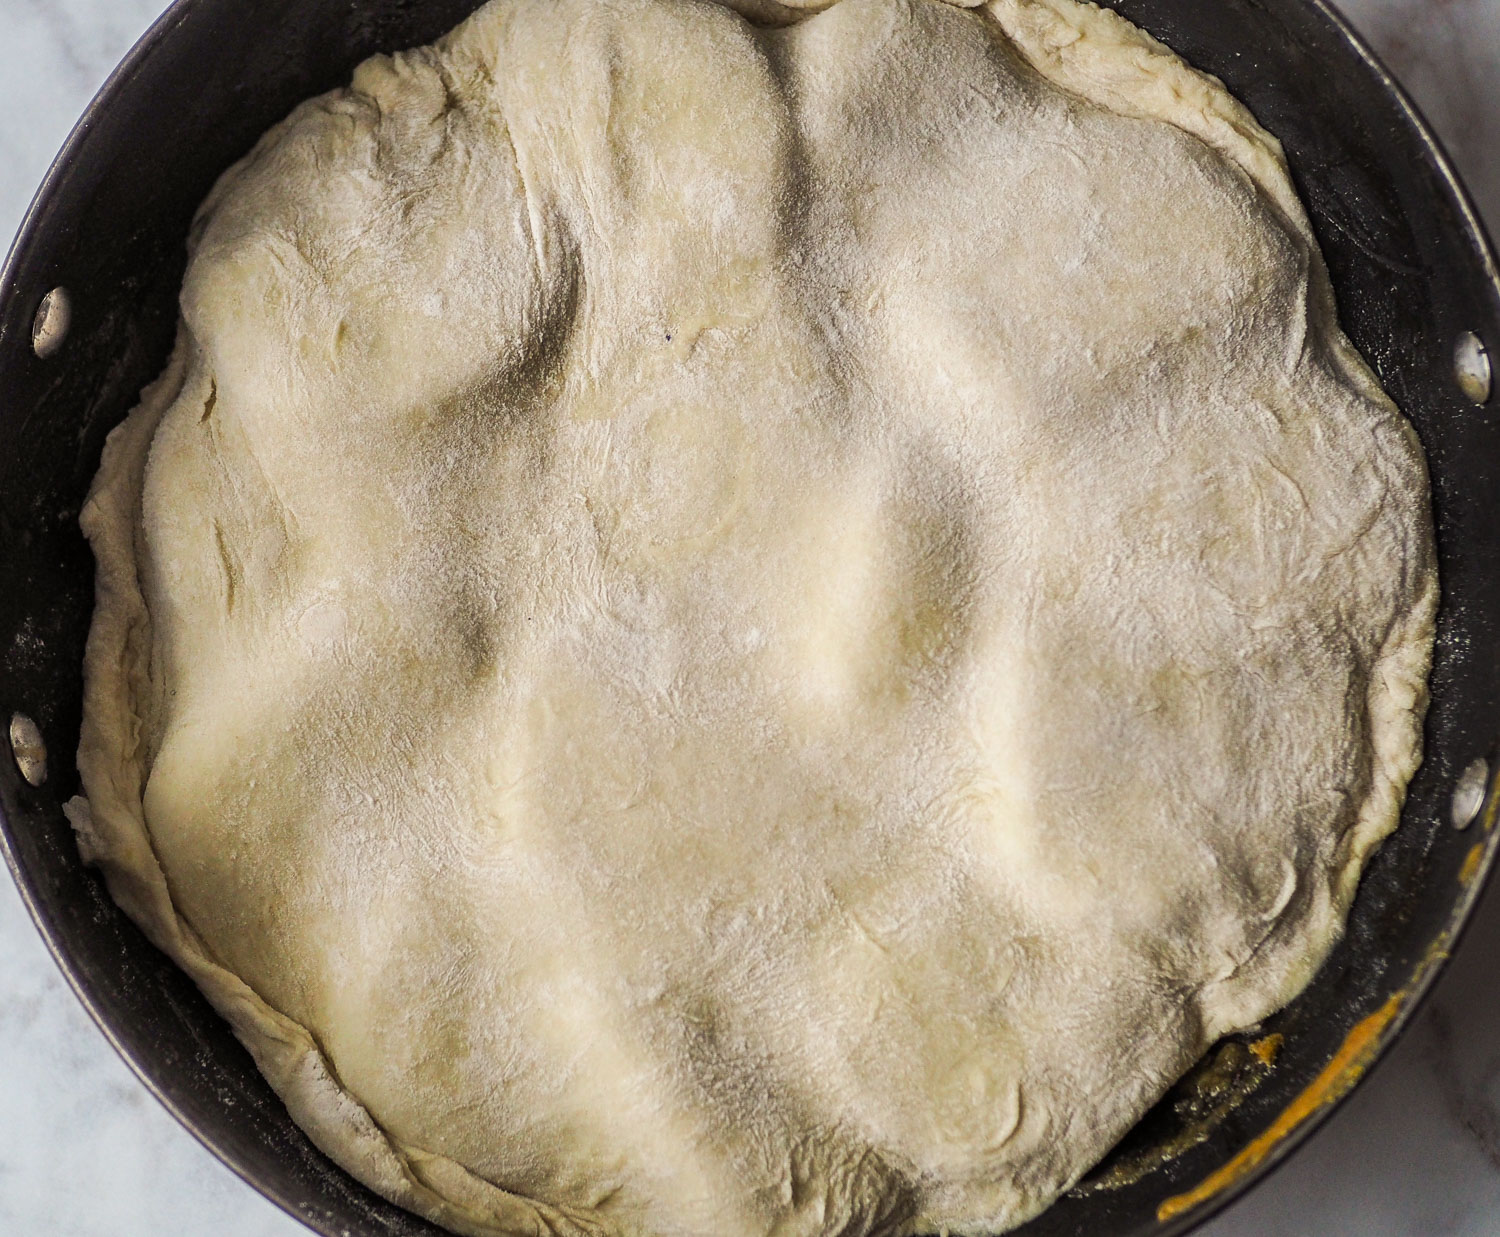
Generously dust your work surface with flour. Roll the puff pastry out (if not pre-rolled) to about 1/8-inch thickness. Cut the dough into a round that is just slightly larger than your skillet diameter. You want a circle that completely covers the apples and can be tucked along the inner rim of the skillet like a little apple-blanket. Shake off any excess flour from the pastry and transfer to the skillet, draping the pastry over the apples as described above. Use a fork to gently prick holes all over the pastry, which stops it from puffing up too much.
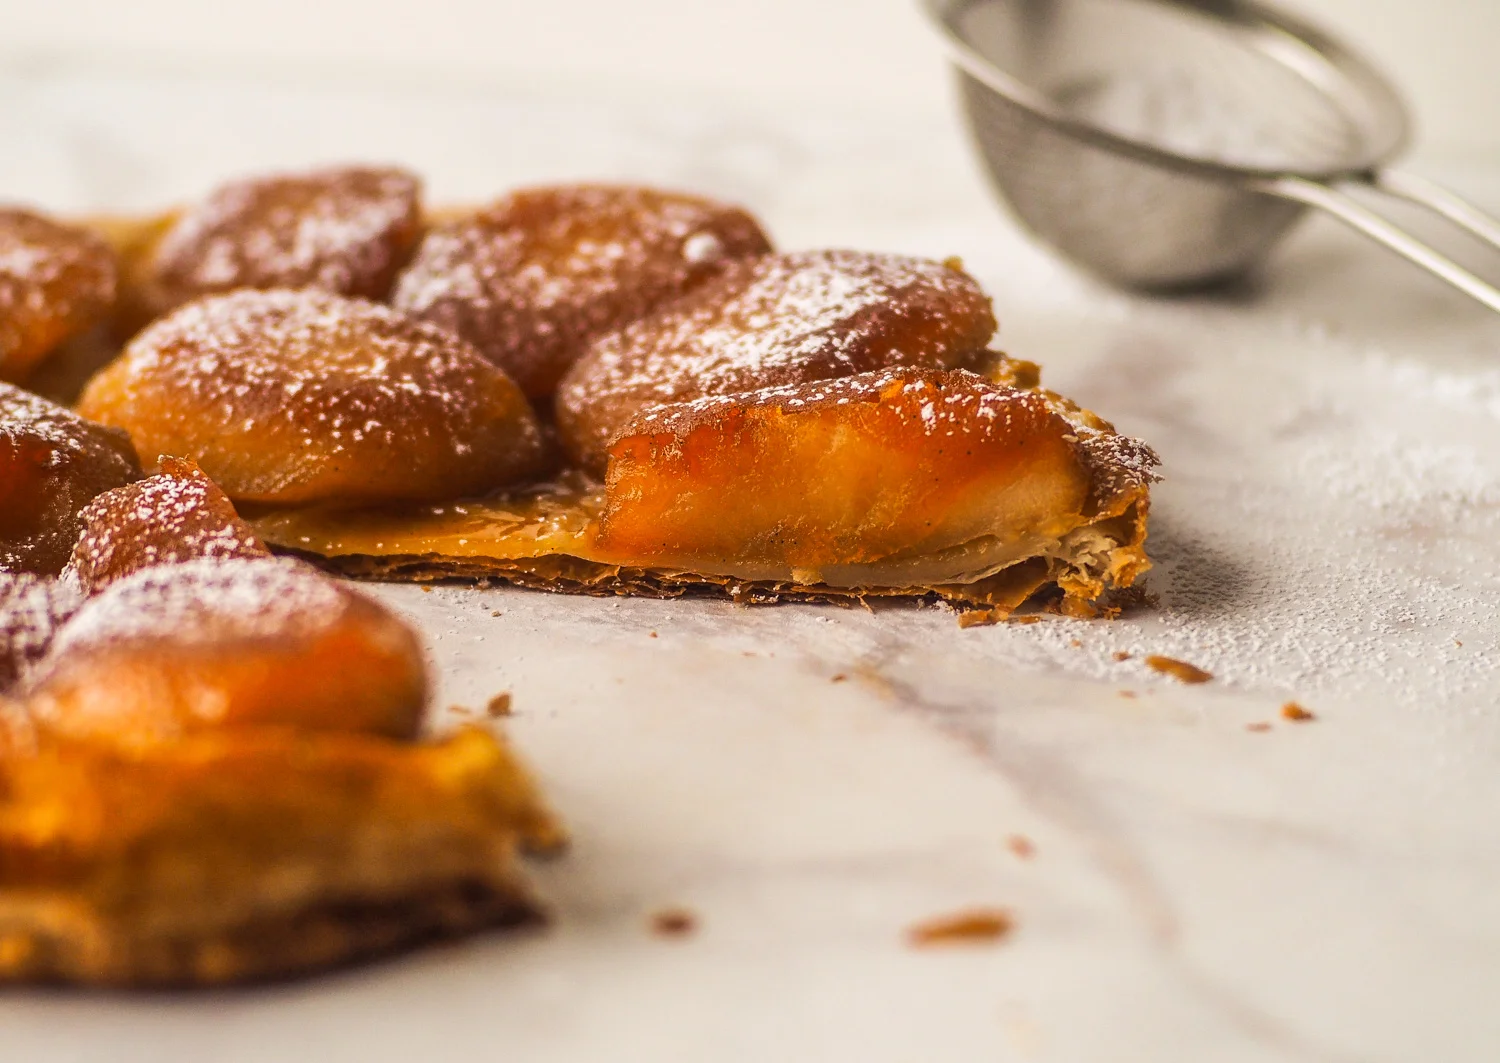
Bake the pastry on the centre rack of the oven for 20 minutes, until puffed and starting to brown. If your oven runs hot, your pastry might already be quite dark by this point. If it looks close to burning, pull the tart out now. If it could get browner, turn the temperature down to 350 degrees F and bake for another 10-15 minutes (or up to 25 more minutes), checking periodically. I baked mine for a total of 30 minutes, but everyone’s oven is different and you will need to monitor the pastry to decide when to take the tart out. Puff pastry tends to cook fairly quickly, but try to not bake the tart for FEWER than 20 minutes. Let the tart rest for 5 minutes (no longer!) and then place a plate/serving platter/cutting board on top of the skillet and turn to invert the tart onto your serving vessel. Be confident – use a quick, steady, firm motion when you flip! There is a direct correlation between confidence in flipping and aesthetic presentation (not really, but you’re more likely to screw up if you’re slow and tentative). If any of the apples were misplaced during the flip, just re-arrange as needed to pretty everything up. I found that I needed to press down very gently on my inverted tart (using a cutting board) to even out the flatness of my pastry, which had puffed up slightly more on one side and caused the tart base to be lopsided. Let the tart cool slightly and serve warm with a generous dusting of icing sugar. Beam with pride.