BA’s Best: Quiche Lorraine

Quiche Lorraine, should you not have had it before, is a wonderful breakfast situation to experience. Thick-cut bacon and sharp Gruyere cheese, all mingled together in an eggy custard, held together by a buttery crust. What on earth could you disagree with there? It’s devastatingly rich and one of those things that you tell yourself you couldn’t possibly eat another bite of while simultaneously lifting the next forkful to your lips.
Wait wait wait, before I let you fall in love with the idea of this recipe, I should probably slap you with the reality of the situation, which is this: homemade quiche is a pretty time-consuming process. Like, quite time-consuming. You know why? Because the secret to good quiche is that it’s actually pie. So, with that in mind, I don’t want to hear any complaints about how this recipe (and the previous one) seem dauntingly long and unnecessarily time-consuming. Put in the effort (which I will say is considerably lessened with the garlic tart recipe), or buy a frozen quiche and be done with it. And by ‘it’, I mean ‘delicious things’. Choose wisely.

BA’s Best: Quiche Lorraine
Taken from BA’s Best arsenal, with the most minor of tweaks here and there
Serves 8
Ingredients:
Crust:
1 ½ tsp kosher salt
1 tsp white sugar
2 cups all-purpose flour, measured correctly + more for dusting
5 tbsp unsalted butter, cut into pieces and chilled
3 tbsp lard or shortening, chilled
Filling:
8 oz thick-cut bacon, cut into ½-inch pieces
3 large shallots, thinly sliced
3 tbsp lard or unsalted butter
2 sprigs of thyme
1 bay leaf
3 ½ cups half-and-half
8 large eggs, room temperature (submerge in tepid water for ~20 minutes)
2 tsp kosher salt
¼ tsp cayenne pepper
Pinch of freshly ground nutmeg
2 oz (~1 loosely packed cup) finely grated Gruyere cheese
Directions:
Make the crust first as it’s a whole production. Pulse the salt, sugar, and 2 cups flour in a food processor until combined. Add the butter and lard/shortening and pulse until the mixture resembles coarse meal, with a few bigger pieces still visible. With the motor running on low, drizzle in 7 tbsp ice water (don’t let the ice sneak through!) Pulse until the dough is still quite crumbly, but holds its shape when squeezed in your hand. Turn the dough out onto a work surface and gently knead it once or twice, just to incorporate any particularly dry, shaggy parts. It will seem quite crumbly still, most likely. Press the dough into a 6-inch disk and wrap in plastic. Chill for at least 1 hour.
Place a rack in the lowest part of the oven and preheat to 375 degrees F. Roll out the chilled dough onto a lightly floured workspace, dusting with flour as needed to avoid sticking. Roll the flour into a 14-inch round, then fold the round into quarters. Carefully transfer the dough so that the point of the folded circle sits in the middle of a pie dish. Gently unfold and let the dough slump into the edges of the dish (avoid stretching or pulling the dough tautly at any point in this process). Trim the dough to leave a 1-inch overhang, then fold the overhang under to form a lip. Pinch and crimp the edges as desired, then chill for 30 minutes.
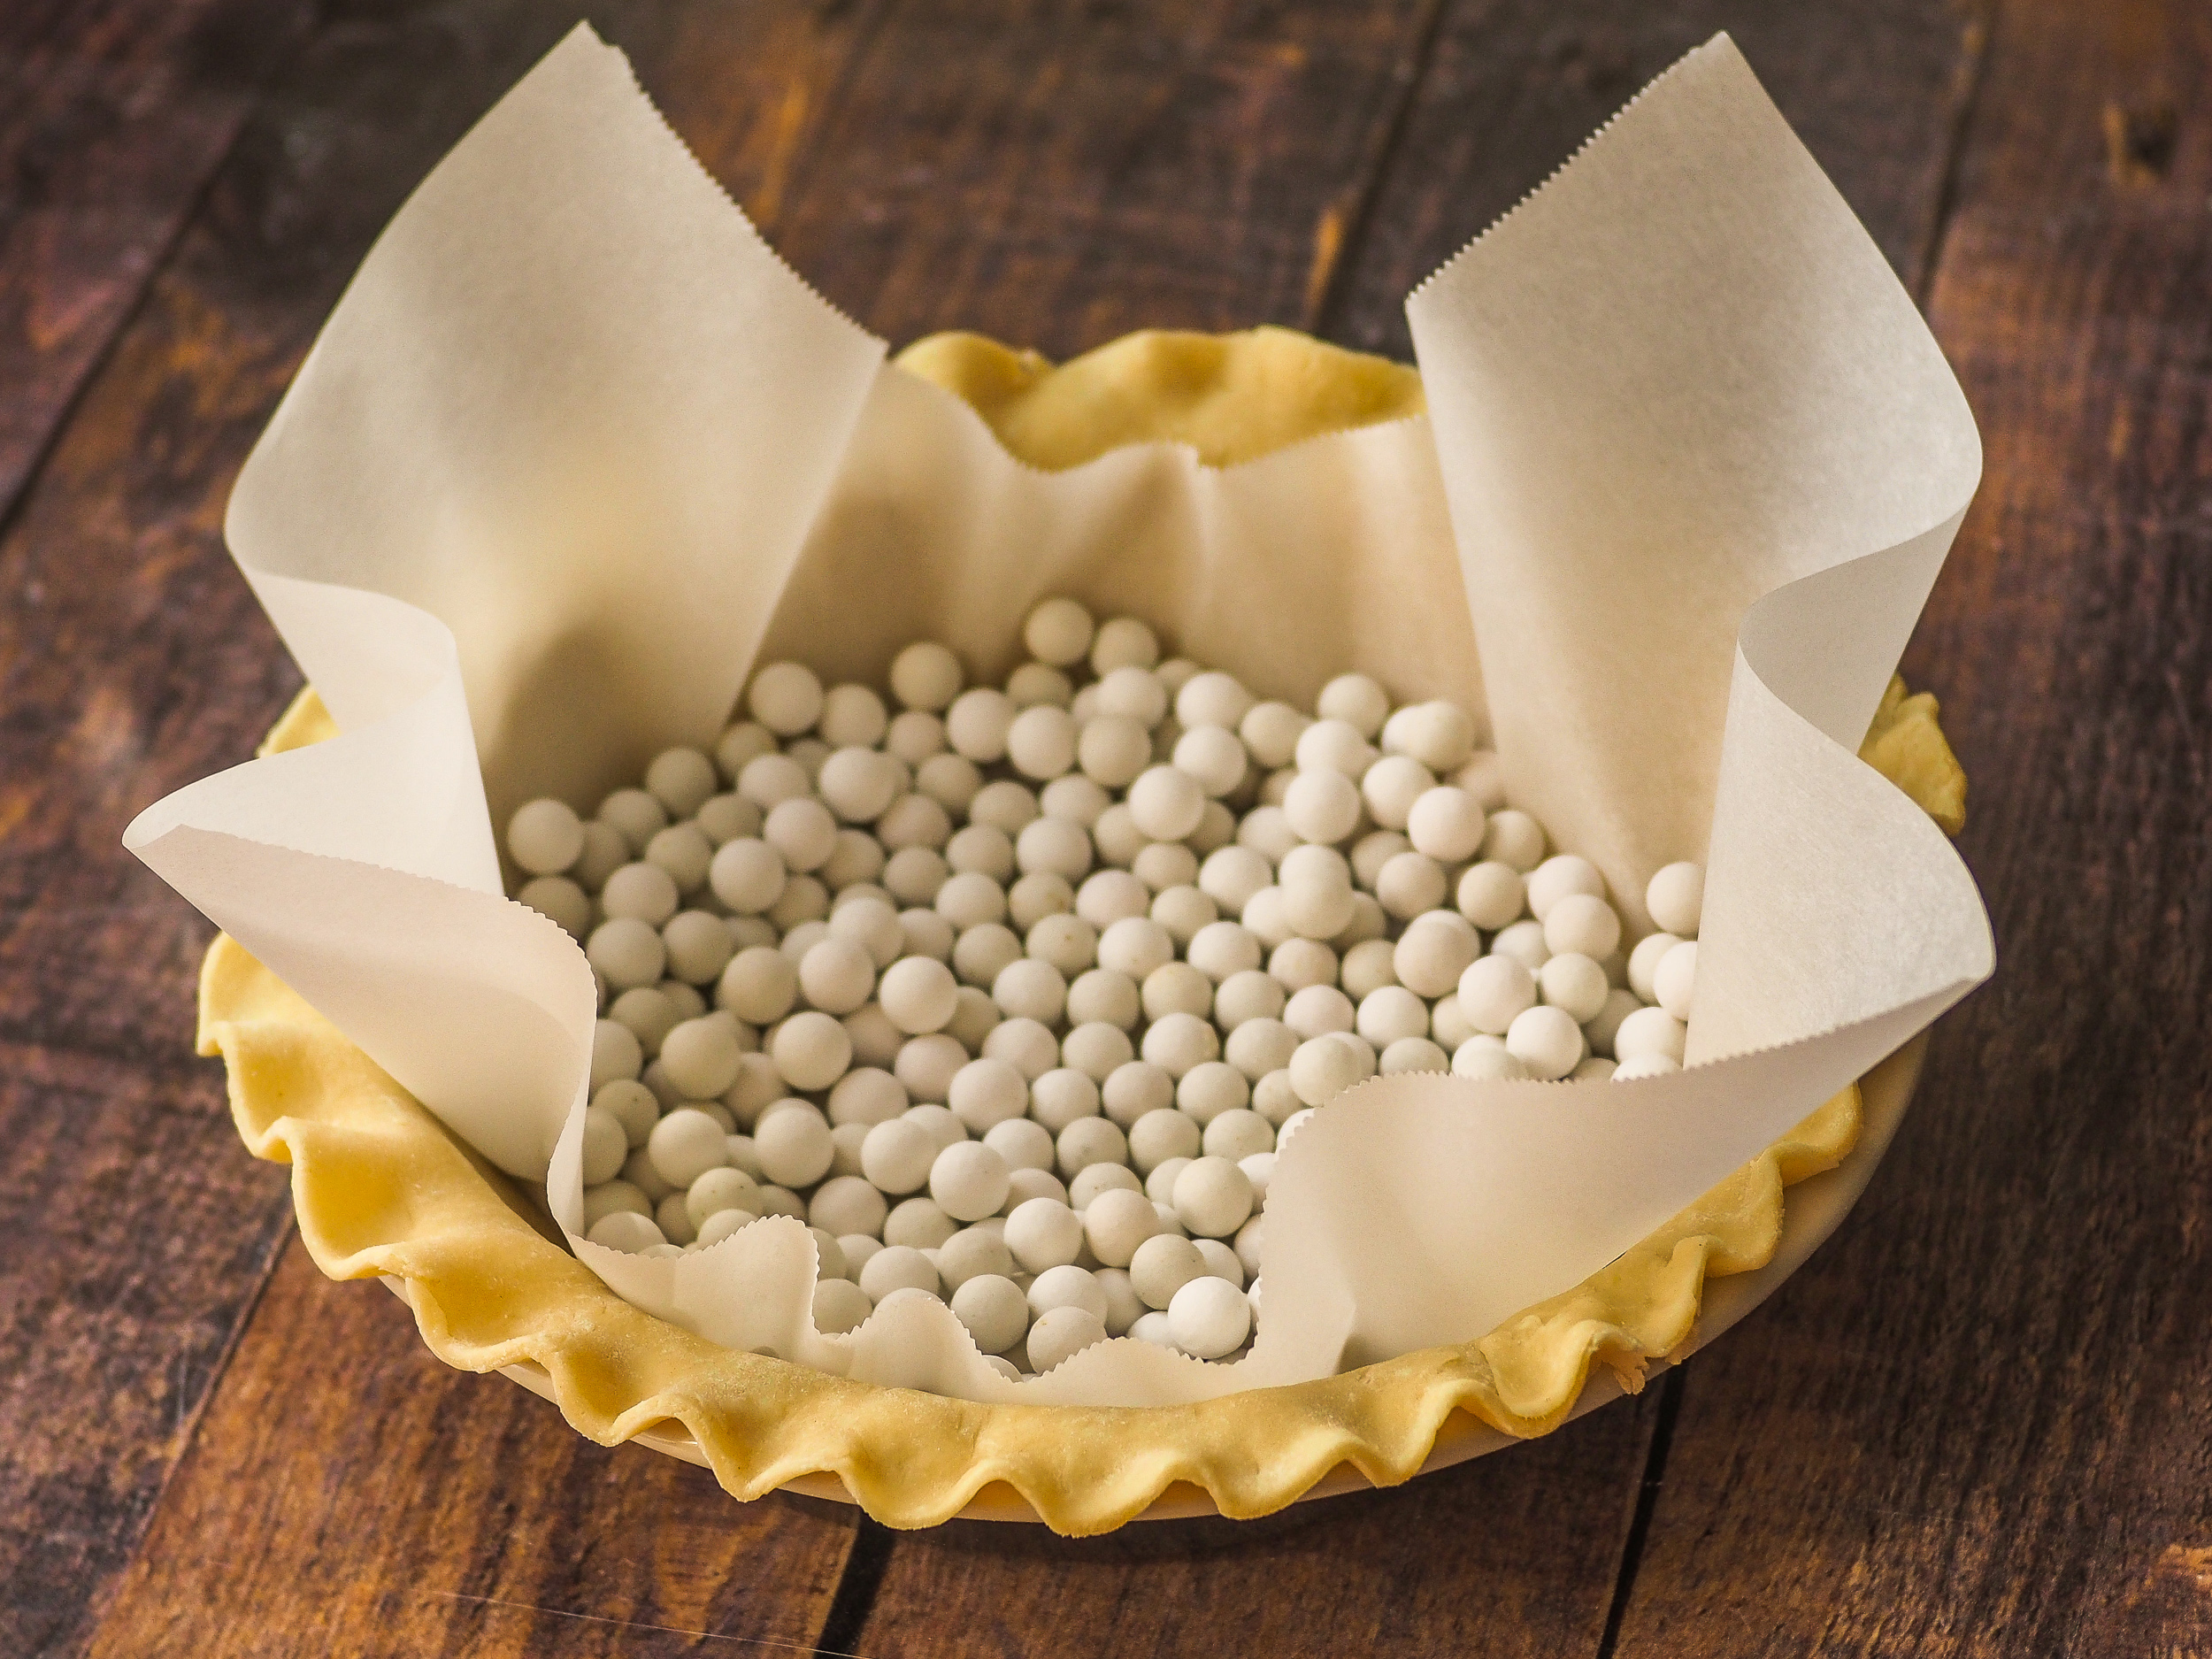
Once chilled, place a sheet of parchment paper over the dough, and fill with pie weights or dried beans. The goal here is to evenly distribute the weight so that the crust gets weighed down, as this minimizes the possibility that it will puff up unevenly (ideally there should be no puffing at all) – this is called blindbaking. Place the weighted crust in the oven and blindbake for ~25 minutes, until the crust is dry and just starting to brown. If your oven runs hot, start checking at the 15-20 minute mark. Very carefully remove the parchment paper and weights, and reduce the oven temperature to 350 degrees F. Bake until the crust is set and beginning to brown in the centre, ~15 minutes (but again, this could be less if your oven runs hot or patchy). Transfer to a wire rack to cool.
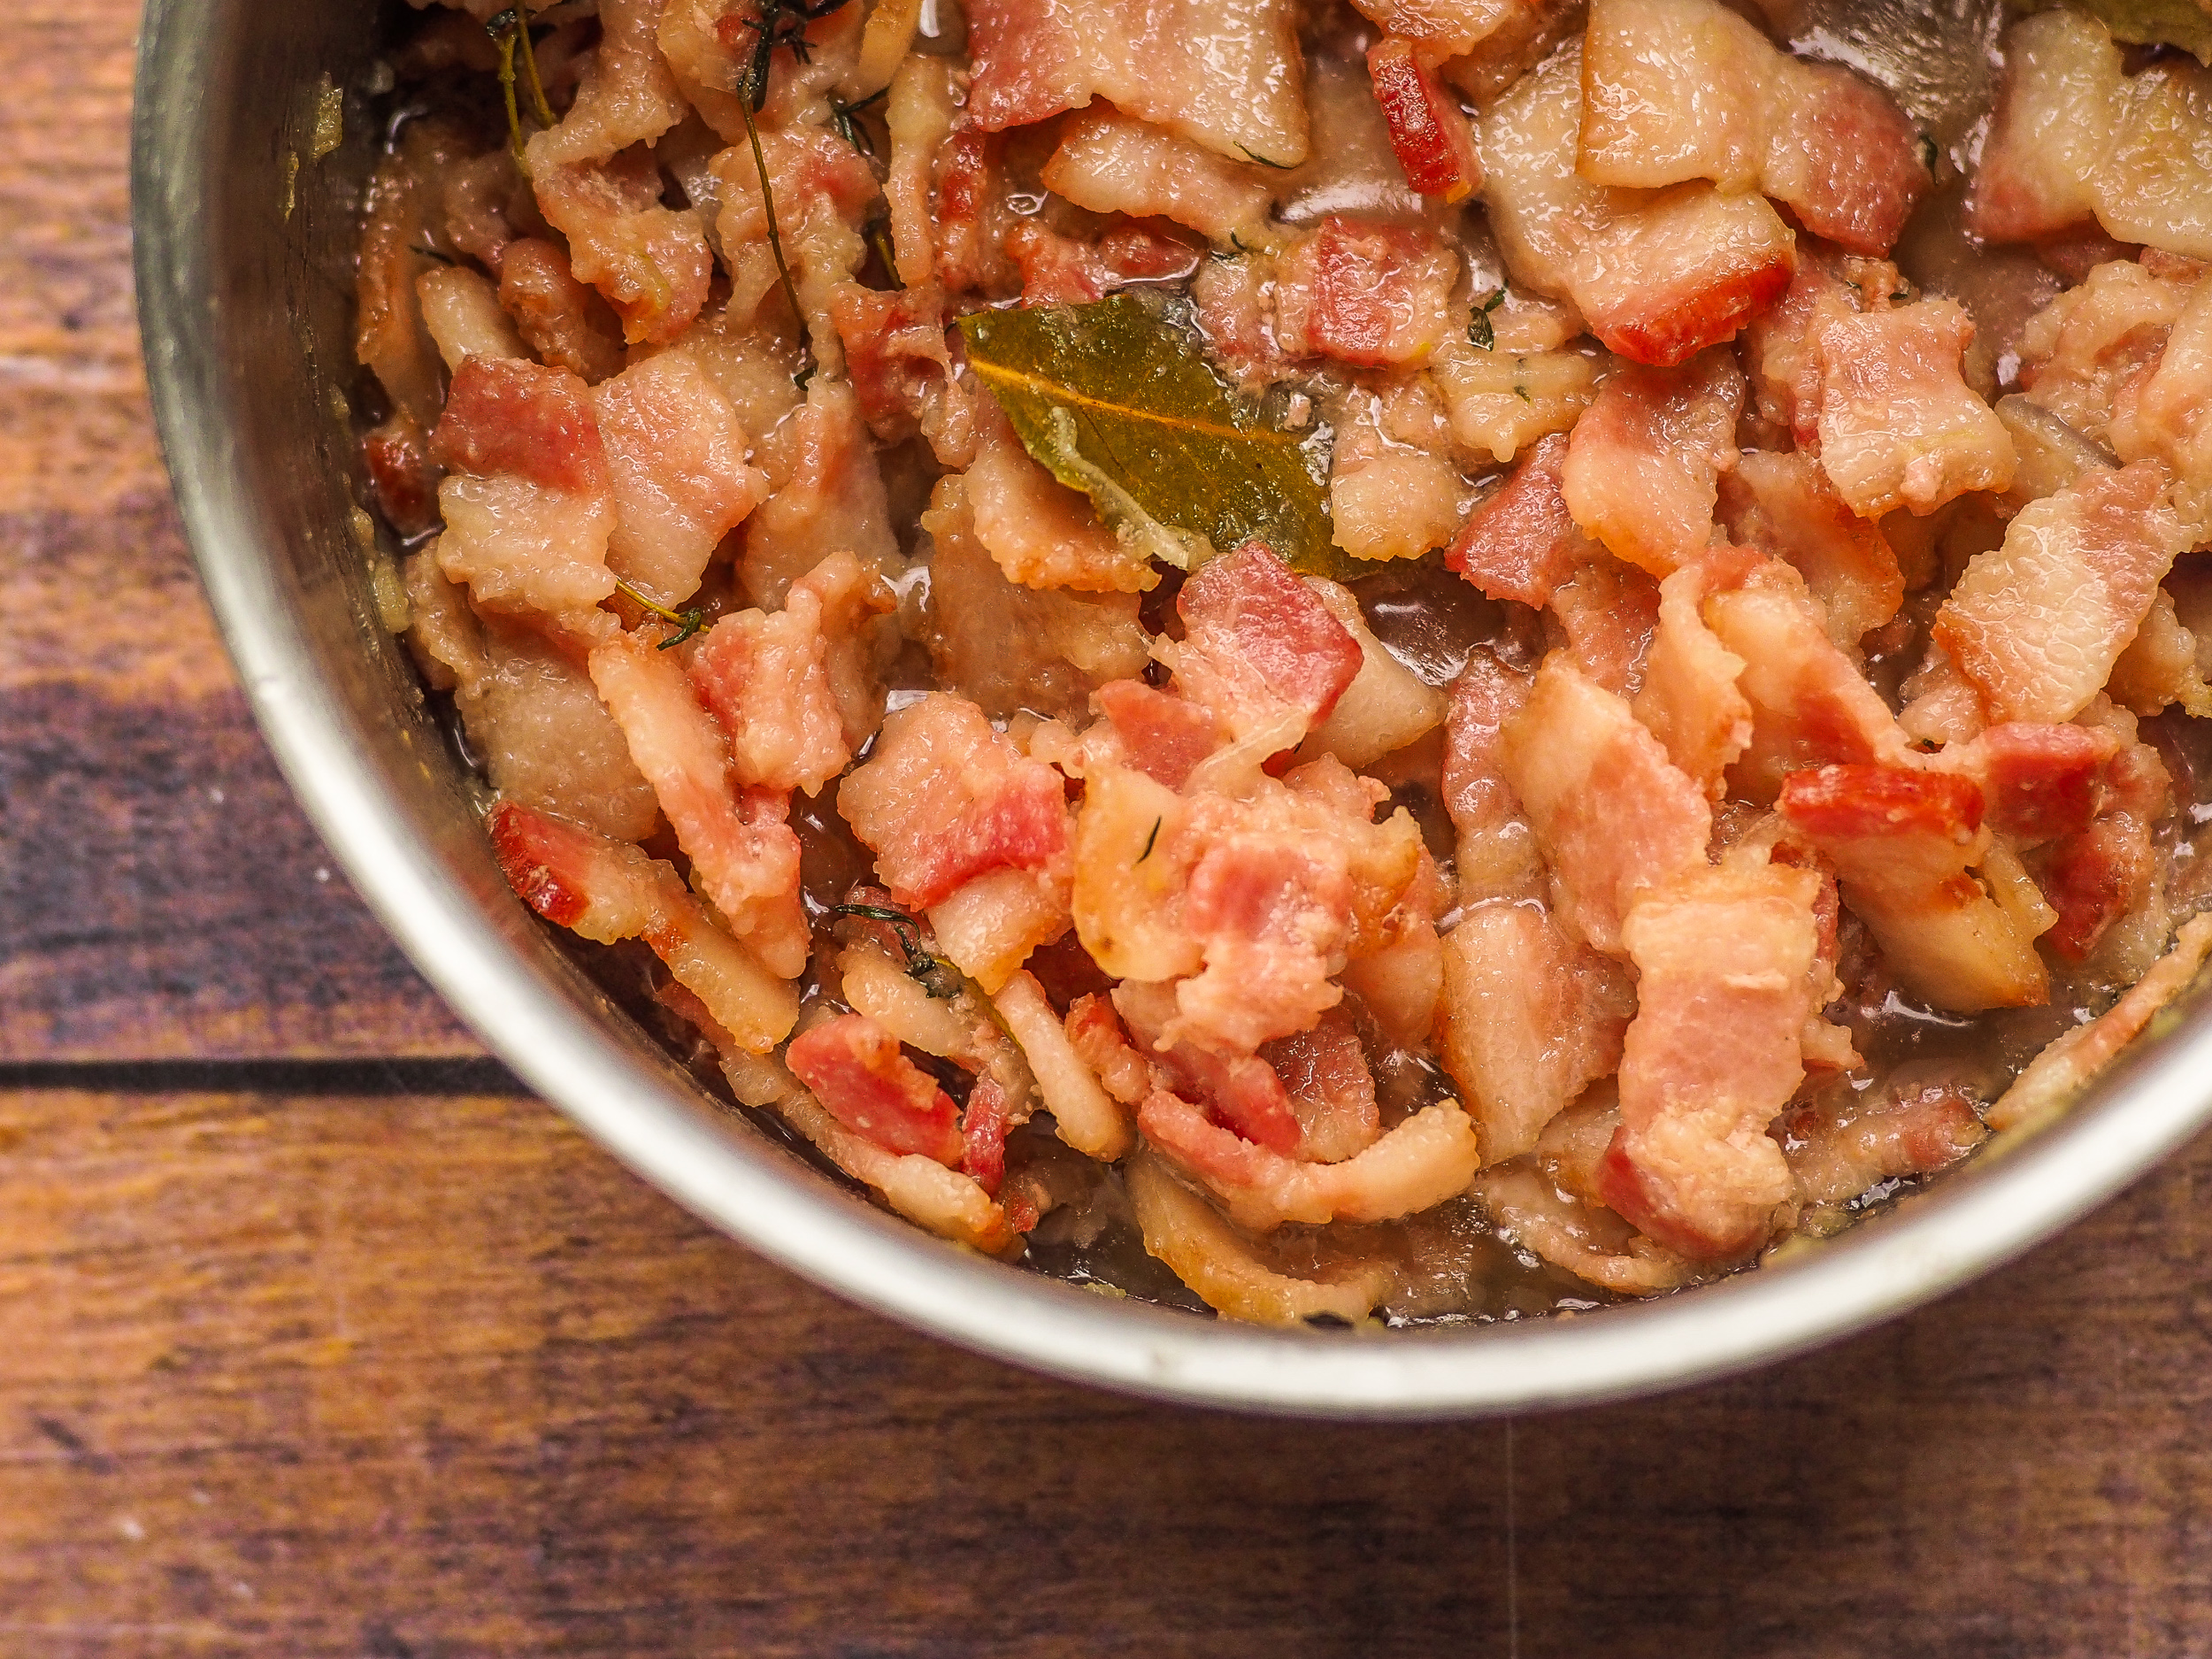
While the crust bakes and cools, start on the filling. Combine the chopped bacon, shallots, lard/butter, thyme, and bay leaf in a small saucepan over medium-high heat. Stir occasionally until the lard/butter begins to bubble, at which point reduce the heat to low and cook for ~20 minutes, until the shallots and bacon are soft. I was personally quite surprised to learn that BA did not recommend crisping up the bacon for this recipe, but I will say, this rendered down situation smells incredible and the taste is top-notch (lovers of flaccid bacon, rejoice; lovers of crisp bacon, don’t worry, you won’t notice once it’s all mixed in with an eggy custard anyway). Let the bacon mixture cool for 1 hour, then strain through a fine mesh sieve, discarding the thyme and bay leaves. Transfer the strained bacon and shallots to a medium bowl and set aside. Meanwhile, heat the half-and-half in a medium saucepan over medium-high heat until it just begins to bubble. Remove from the heat and cool for 1 hour (try to time this along with the bacon cooling!) While everything cools, reduce the oven to 325 degrees F (or preheat it if you turned it off following the crust baking). In a blender, liquify the eggs on medium-high speed until foamy. Add in the cooled half-and-half, kosher salt, cayenne, and nutmeg. Blend on medium-low speed until the custard is very smooth. Set aside.
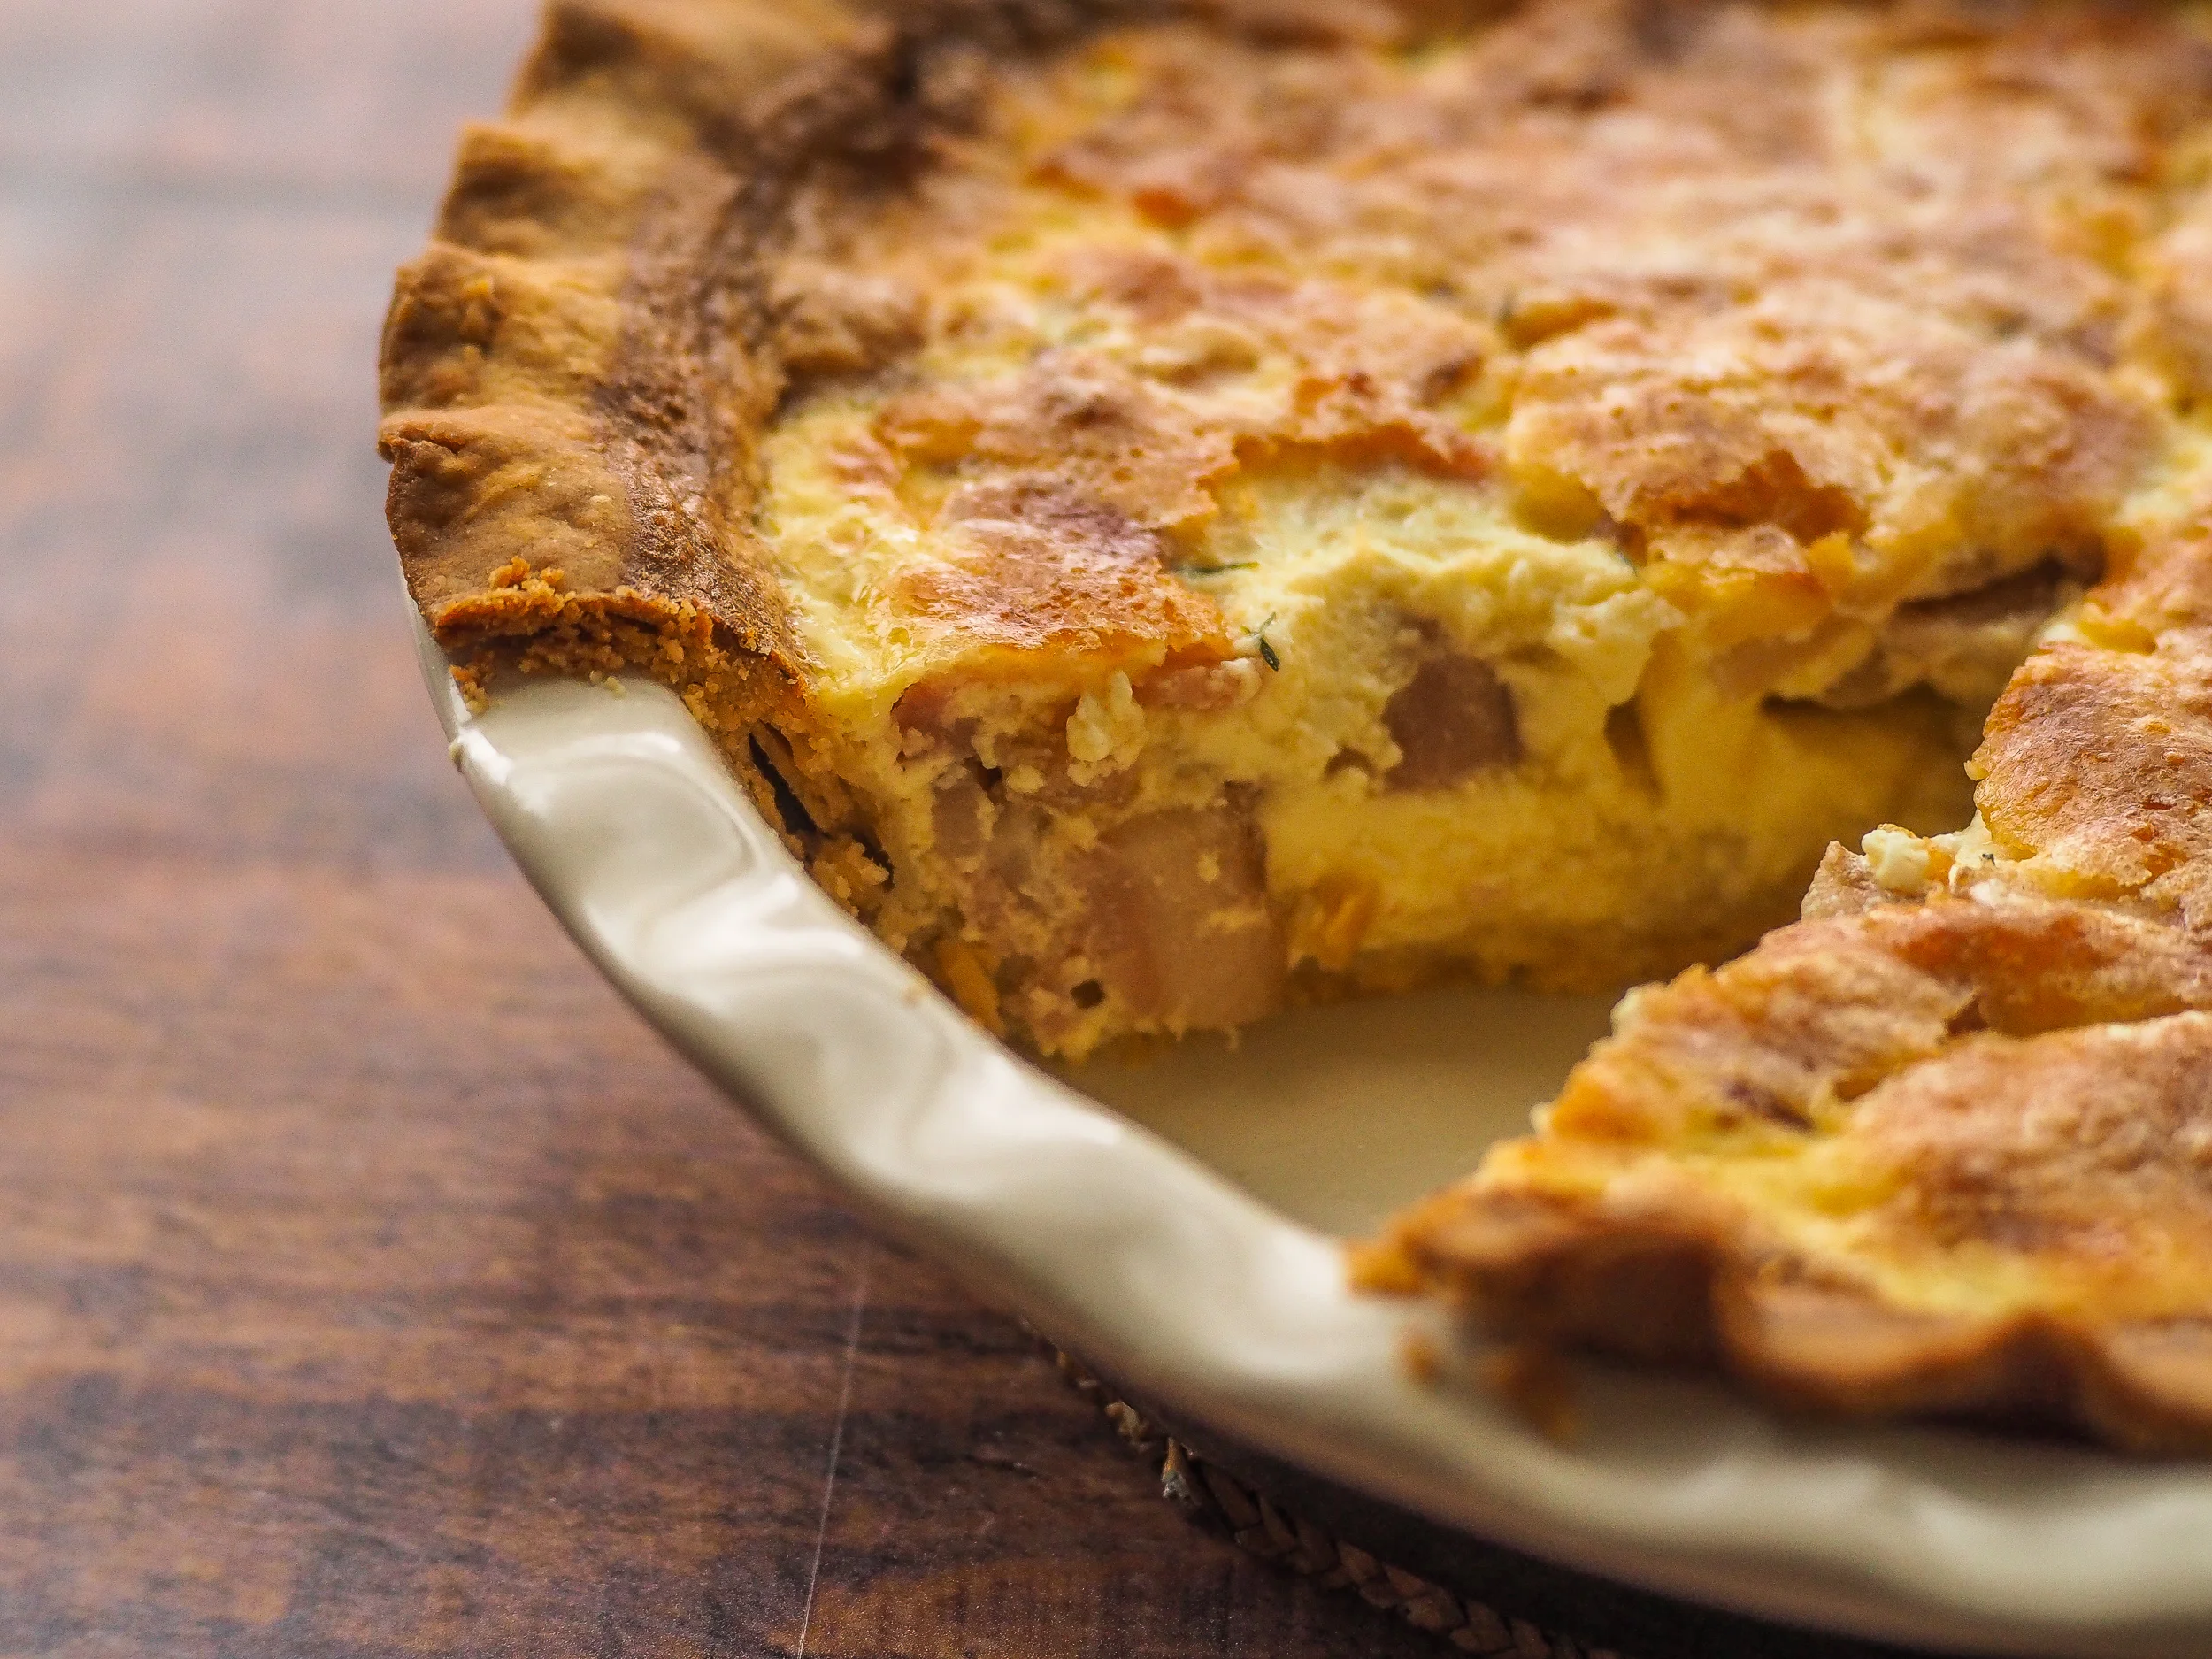
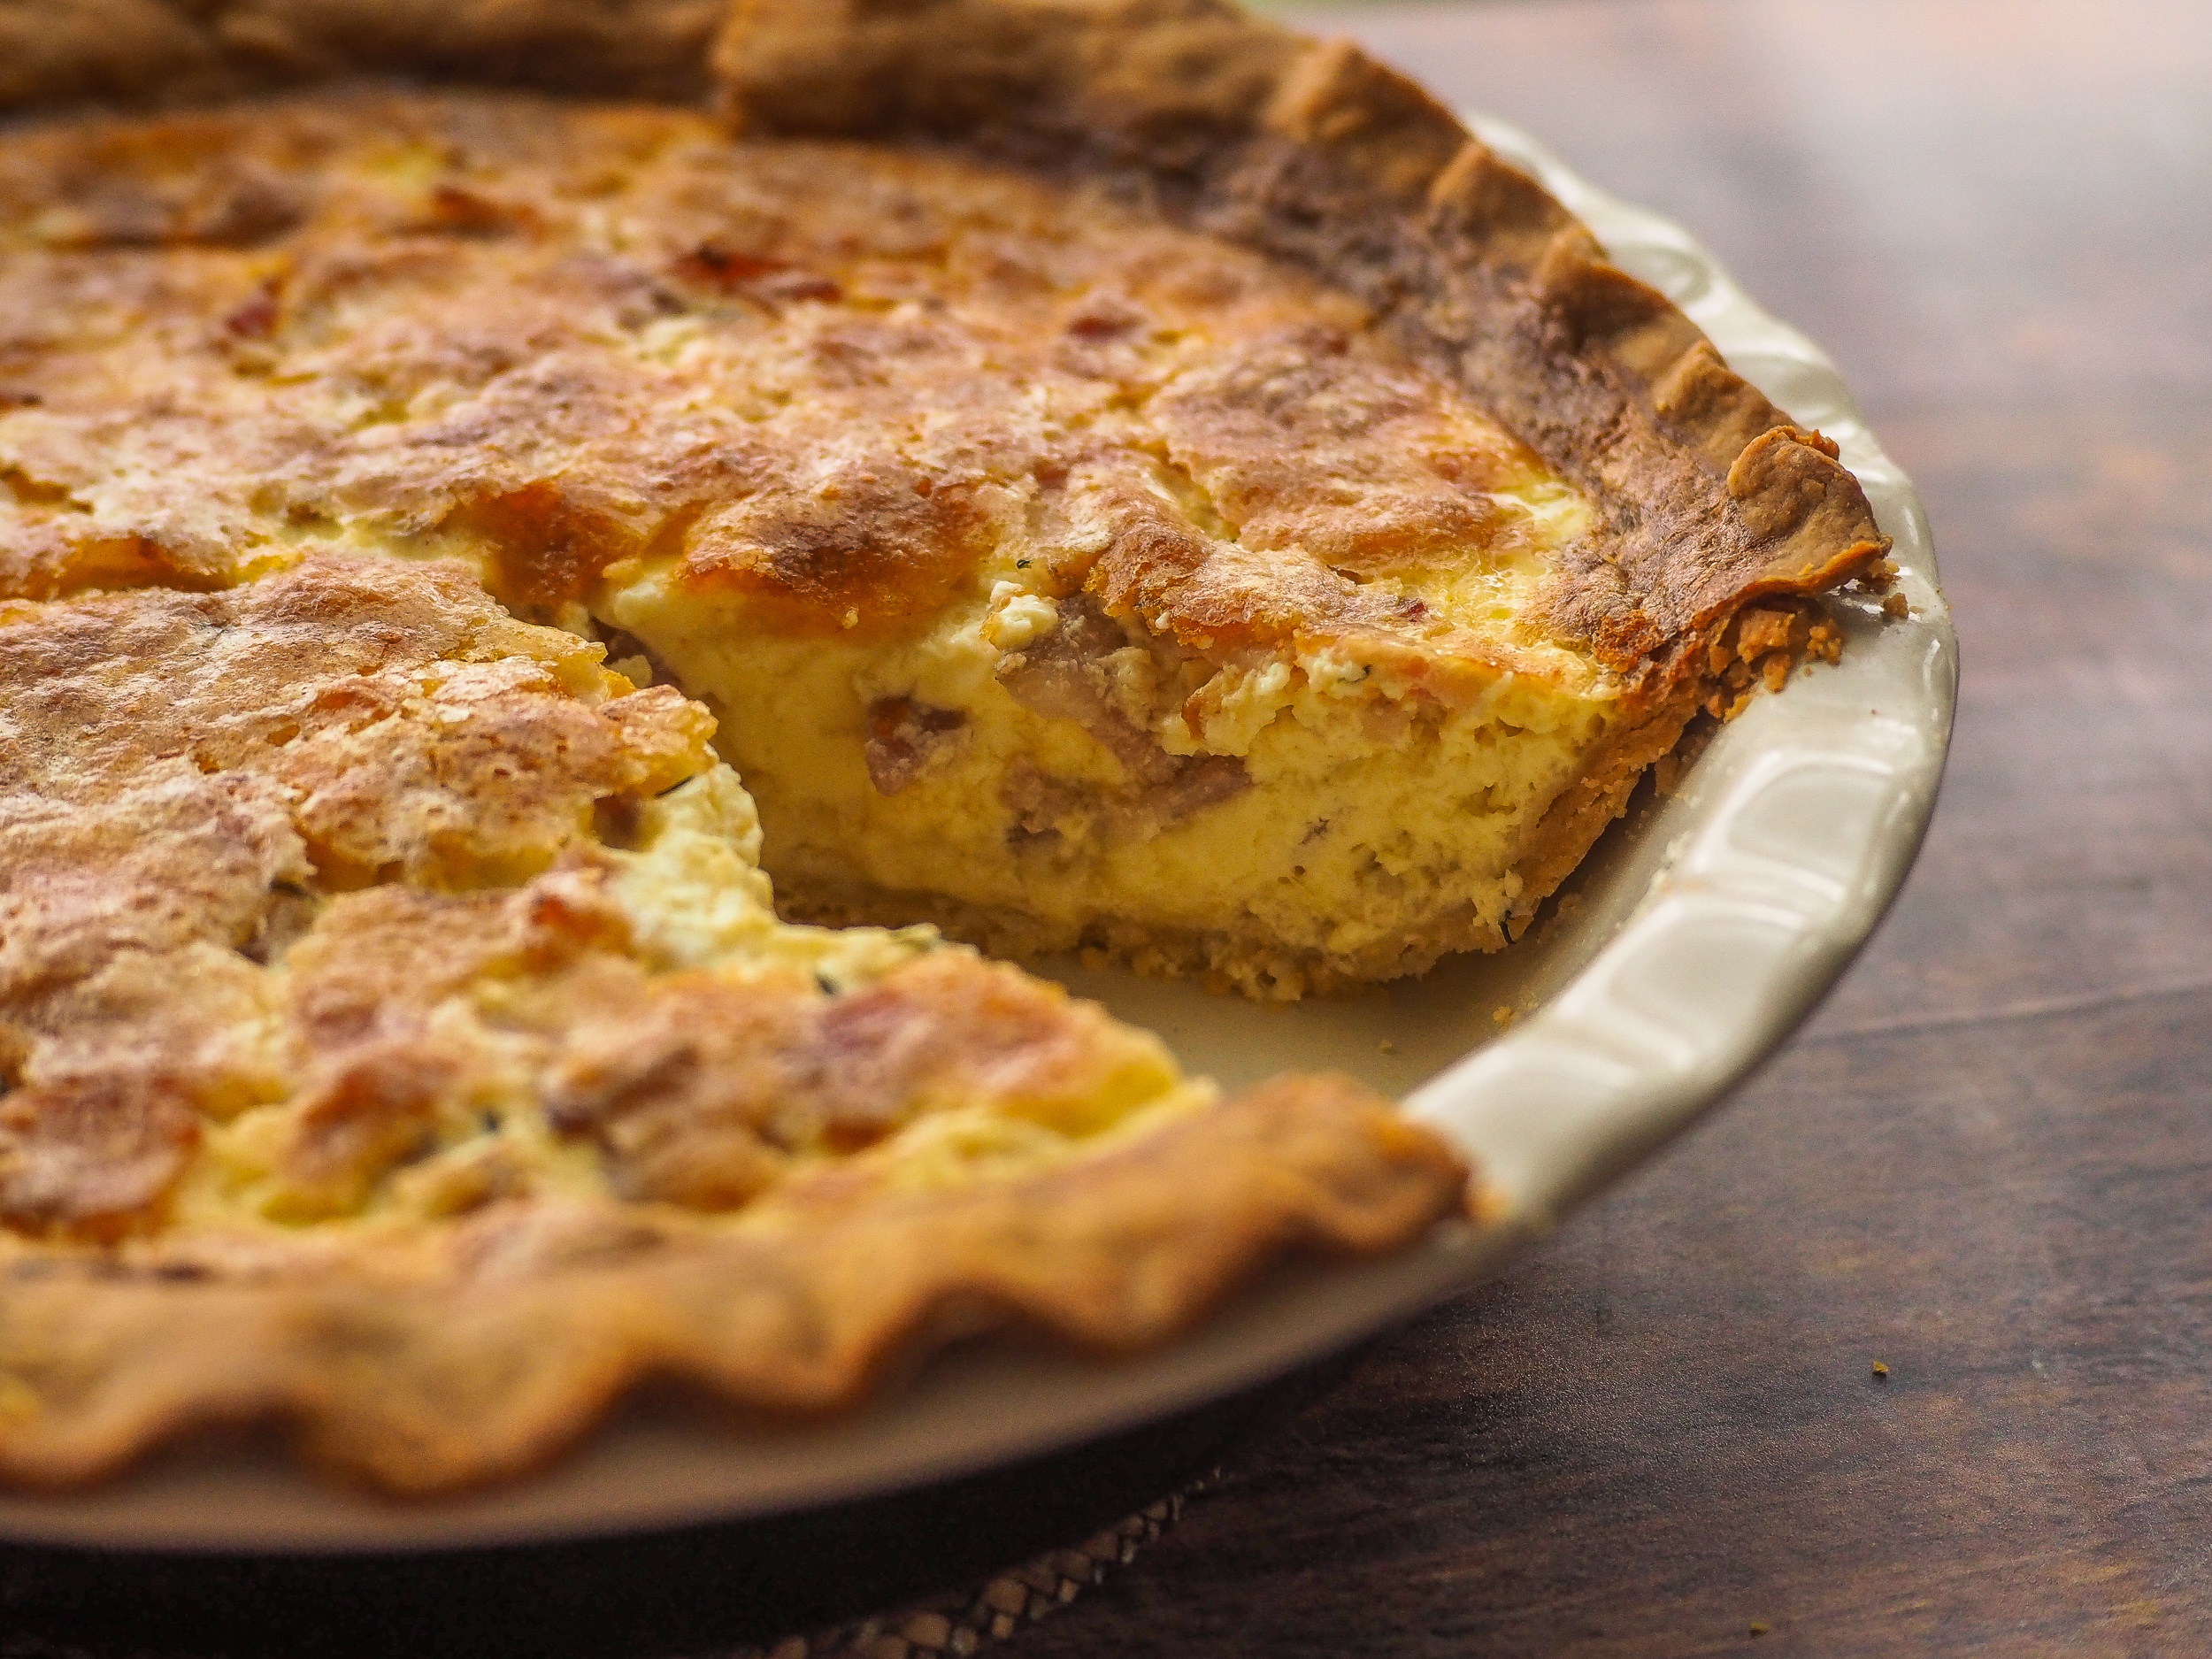
Place the pie dish (with crust still in it, duh) on a rimmed baking sheet. Sprinkle Gruyere evenly over the bottom of the crust and spoon the bacon mixture over. Pour the custard into the crust until the pie dish is about half-full, skimming any excess foam from the top of the custard. Transfer the quiche to the centre rack of the oven (on the baking sheet – this will catch any dribbles), then carefully top it up with custard until you reach the point of almost causing an overflow. I found that I did not need to use the entirety of the custard to do this, and so wound up discarding some. Bake the quiche until the edges are set but the middle still has a very slight wobble to it, anywhere from ~55-75 minutes. You will almost certainly need to cover the crust within the first half hour of cooking, as it does tend to take on colour rapidly. I recommend cutting a foil circle that fits neatly over the crust without covering the filling at all (this is easier to measure prior to baking, so hopefully you’re doing what I ALWAYS TELL YOU TO DO and are reading the recipe through first before attempting). Transfer the baked quiche to a wire rack and let cool for 3 hours before slicing, though you could of course refrigerate it and serve cold as well. Taste that porky, lard-y goodness coursing through your arteries.
